
DIY Board and Batten Wall
Learn how to plan, build, caulk, and paint a DIY board and batten wall with a clean, custom-looking finish for almost any room.

Introduction
A DIY board and batten wall adds structure, depth, and a tailored finish without requiring a full room remodel. The look is created with horizontal trim pieces and evenly spaced vertical battens, usually painted one color for a seamless built-in effect. It can work as a traditional wainscoting treatment, a dramatic full-height accent wall, or a practical way to give a plain entry, dining room, bedroom, or hallway more presence.
The cleanest results come from planning before cutting. Wall dimensions, outlet locations, existing baseboards, trim thickness, and the wall’s condition all influence the layout. This guide walks through how to design and install a DIY board and batten wall that looks intentional rather than improvised, while accounting for common issues in American homes such as uneven walls, textured drywall, and electrical boxes.
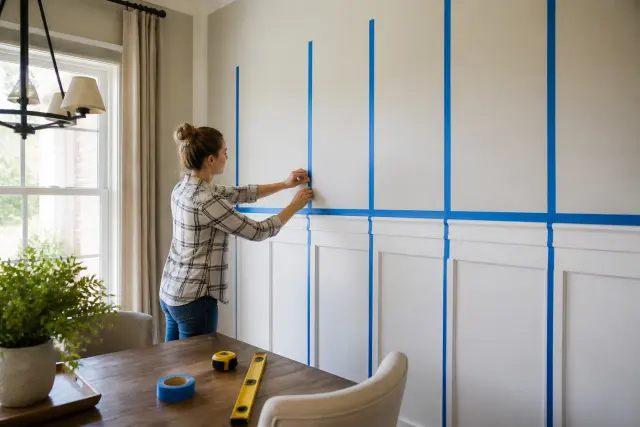
1. Choose the Right Board and Batten Style
Start by deciding what role the wall treatment should play in the room. A lower wall treatment, often between one-third and one-half of the wall height, is a classic choice for dining rooms, mudrooms, and stair halls. A taller treatment can make a room feel more formal and works well behind a bed or in a long hallway. Full-height board and batten makes the strongest statement and is especially effective on one focal wall.
Set a height that relates to the room
There is no single required height, but the top rail should look connected to nearby architecture. Consider window stools, door casing tops, chair-rail lines, and the ceiling height. In a room with standard-height ceilings, a mid-wall layout often feels balanced. If you are carrying the design through multiple connected rooms, keep the top rail height consistent unless an architectural feature gives you a clear reason to change it.
Select a profile with enough visual weight
Flat stock such as primed MDF or finger-jointed pine is popular because it creates crisp, simple lines. A narrow top cap can add a ledge-like finish, while a more substantial top board gives the installation a traditional look. Keep the profile proportional: very thin battens can disappear on a large wall, while wide trim may overwhelm a small powder room. Bring home a sample piece and hold it against the wall before buying all materials.
2. Measure the Wall and Plan a Balanced Layout
Accurate layout is what separates a polished DIY board and batten wall from one with awkwardly narrow end sections. Measure the total wall width and height in several places. Drywall corners are not always square, floors can slope, and a wall may be slightly wider at the top than at the baseboard. Use the smallest relevant measurement when planning cuts, then measure each actual location before installing a piece.
Calculate spacing before you mark the wall
Decide whether your design will have full-width panels, a centered focal panel, or a feature such as a window or doorway integrated into the pattern. For a simple wall, subtract the combined width of the vertical battens from the usable wall width. Divide the remainder by the number of open spaces you want. The result is the clear space between battens. A test layout with painter’s tape is an easy way to see whether the proportions look right from across the room.
| Layout element | What to check |
|---|---|
| End spaces | Make the two end spaces visually similar whenever possible. |
| Vertical battens | Measure spacing from the same edge of each board, not from board centers. |
| Outlets and switches | Plan whether a batten will land beside, above, or below each electrical box. |
| Top rail | Use a level reference line; do not follow a sloping ceiling or floor. |
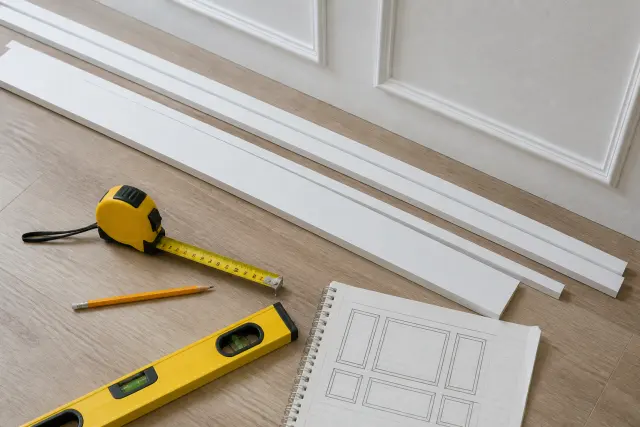
3. Gather Materials and Tools
For a typical painted installation, use straight, paint-grade trim. Primed MDF is smooth and economical for dry, climate-controlled rooms, but it swells if repeatedly exposed to water. Finger-jointed pine is more moisture tolerant and easy to work with, though it may show joints or require more surface preparation. PVC trim is an option for damp areas, but it expands differently than wood and needs compatible fasteners and adhesive.
Common supplies include a tape measure, pencil, level or laser level, stud finder, miter saw, brad nailer or hammer and finish nails, construction adhesive rated for interior trim, caulk, wood filler or spackle appropriate for trim, sandpaper, paintable primer if needed, and interior trim paint. Wear eye protection when cutting or nailing, use hearing protection with power tools, and follow the manufacturer’s instructions for adhesives, fillers, and paints. Provide ventilation when sanding or painting.
Know when to use adhesive and fasteners
Adhesive helps keep flat trim tight to drywall, especially between studs, but do not rely on it alone for heavy pieces. Nail into studs whenever practical, and use enough brads to hold pieces securely while adhesive cures. Avoid excessive adhesive: squeezed-out glue creates cleanup and can interfere with caulk. If you expect to remove the treatment soon, minimize adhesive, knowing that any trim installation can still damage drywall when removed.
4. Prepare the Wall, Baseboard, and Electrical Areas
Remove wall décor, outlet covers, switch plates, and any loose trim. Turn off power at the breaker before working around electrical boxes, and verify the circuit is off with an appropriate tester before touching wiring or removing devices. Do not bury electrical boxes behind trim or make splices outside approved boxes. Outlet and switch boxes must remain accessible, and cover plates must sit properly after the wall treatment is installed.
Clean the wall and repair loose paint, dents, and major holes. A smooth painted wall gives the most refined result. Light orange-peel texture can often be covered successfully, but heavy texture may show through and make caulk lines less crisp. Consider skim coating or sanding a small test area first. If baseboards remain in place, the battens can terminate on top of them; if you replace them, plan the baseboard installation before cutting vertical pieces.
Mark a level top-rail line
Find the desired rail height from the floor at several points, then snap a chalk line or project a laser level. Use that level line as the visual authority even if the floor is out of level. At the bottom, individual battens can be scribed or cut to fit minor floor variation. This keeps the top rail straight, which is usually more noticeable than a small variation at the baseboard.
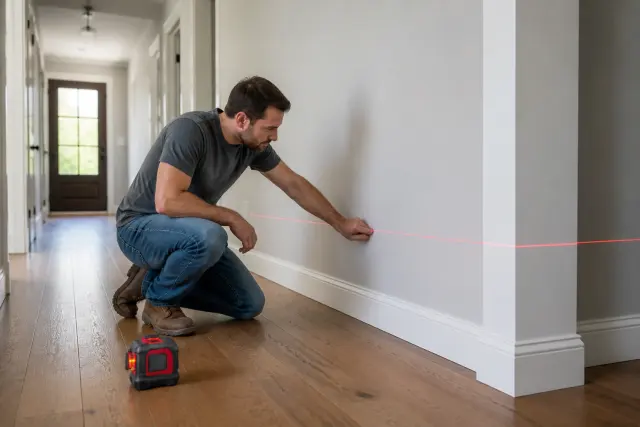
5. Install the Top Rail and Horizontal Pieces
Cut the top rail slightly long, test-fit it, and trim gradually for a tight fit. Apply a restrained bead of adhesive to the back, align the board to your level reference line, and fasten it into available studs. If the wall is longer than a single board, place a scarf joint or a clean butt joint where it will be less conspicuous, preferably over a stud. Check the rail with a level as you work; a small error here travels through the entire design.
If your design includes a lower horizontal rail above the baseboard or a cap molding above the main rail, install those pieces next. Dry-fit intersections before fastening. A simple flat top rail is forgiving and modern, while a cap board needs careful attention to miters at outside corners. For a long run, use boards that are straight and acclimated to the room for a few days when the manufacturer recommends it.
Handle outside and inside corners deliberately
Outside corners benefit from mitered trim or a corner detail that wraps cleanly around both walls. Inside corners are usually easiest with square-cut boards that meet snugly, followed by paintable caulk. Walls may not be perfectly square, so measure and test-fit rather than assuming a 45-degree miter will close perfectly. Small gaps can be caulked; large gaps usually signal that the piece needs to be recut or the wall needs a different approach.
6. Cut and Install the Vertical Battens
Mark every batten location on the top rail and baseboard before you install the first vertical piece. Transfer marks with a level, or use a spacer block cut to the exact clear opening between battens. A spacer block is fast and repeatable, but recheck periodically because a tiny error can compound over a long wall. Start at a prominent visual point, such as the center of a focal wall or the edge of a doorway, based on your layout plan.
Measure each batten opening separately from the underside of the top rail to the top of the baseboard or lower rail. Cut, dry-fit, then install the piece. Hold it plumb with a level, apply adhesive sparingly, and nail it in place. If a wall bows inward, use fasteners strategically to pull the trim tight. If it bows outward, do not force a thin board so aggressively that it bends; a small controlled caulk line is often less visible than distorted trim.
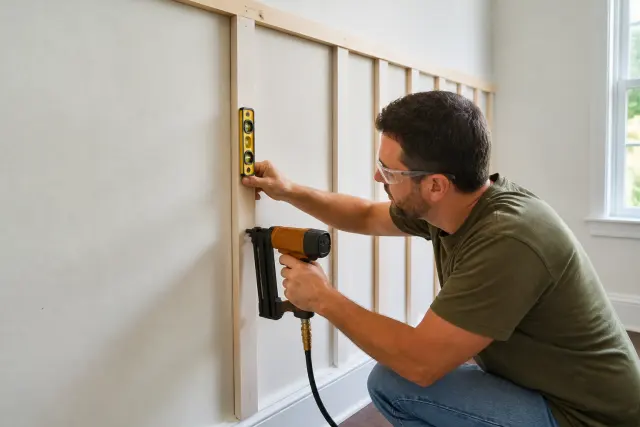
7. Work Around Doors, Windows, and Outlets
Door and window casing should usually remain the dominant trim element. Let battens terminate neatly against casing rather than crowding it with a narrow, accidental-looking strip. In some layouts, a wider vertical stile beside a door casing is the best visual solution. Mock up these areas with tape or scrap trim before committing, particularly when the feature is near the end of the wall.
Keep electrical devices accessible
When a batten intersects an outlet or switch area, do not cover the box. Often, the simplest option is to stop and restart trim around the cover plate, maintaining clean, symmetrical cuts. If the finished wall thickness changes the device depth, approved box extenders and longer device screws may be needed. This is electrical work with safety and code implications; if you are uncertain about box fill, device mounting, or wiring, hire a licensed electrician.
For radiators, return-air grilles, thermostats, and access panels, preserve required clearances and service access. Never block a return grille or create a trim ledge that interferes with a heating appliance. Rental homes, condominiums, and historic properties may also have association or landlord rules about alterations, so check before beginning.
8. Fill, Caulk, Sand, and Prime for a Seamless Finish
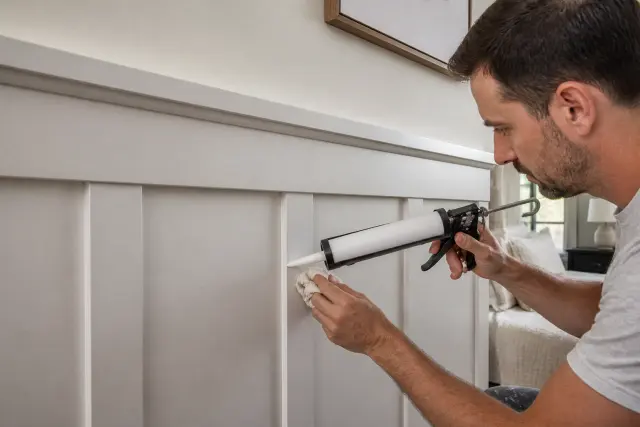
Finish work makes the wall look like permanent millwork. Fill nail holes with a paintable filler, allow it to dry fully, and sand it flush with fine-grit sandpaper. Wipe away dust before caulking. Use paintable acrylic latex caulk along the edges where trim meets wall and at small joints. Cut a small nozzle opening and apply a modest bead; too much caulk creates a rounded, messy line that is difficult to paint cleanly.
Do not caulk every seam indiscriminately. Leave intentional movement joints where recommended by the trim or adhesive manufacturer, especially with PVC products or in spaces with bigger temperature swings. Avoid caulking gaps that indicate a loose board or a poor miter; repair the fit first. Once filler and caulk are dry, inspect the wall under side lighting, which reveals nail divots, uneven edges, and missed seams better than overhead lighting alone.
9. Paint the Wall Treatment for a Durable Look
Painting the battens and wall the same color creates a cohesive, architectural finish and minimizes the visual impact of drywall texture. A contrast color can emphasize the panel pattern but makes imperfections more noticeable. In either case, use a quality interior paint suitable for trim and walls. Satin or semi-gloss is common on trim because it cleans more easily, while eggshell can offer a softer, lower-sheen whole-wall appearance.
Use the right painting sequence
Prime raw wood, patched areas, and unprimed MDF according to the product instructions. Then brush paint into inside corners and along trim edges before rolling broad wall areas. A small angled sash brush and a mini roller make the work manageable. Allow recommended drying time between coats, and avoid pressing furniture against newly painted trim until the finish has had time to harden.
Color can alter how the proportions read. Warm whites make the detail subtle, deep colors make it dramatic, and midtone neutrals show shadow lines without dominating the room. Test paint on a large sample board or an inconspicuous part of the wall, and view it in daylight and evening artificial light before choosing the final color.
10. Maintain the Wall and Know When to Call a Pro
Routine maintenance is simple: dust ledges and wipe marks with a soft cloth and a mild cleaner compatible with your paint. Repair chips promptly with saved touch-up paint. In bathrooms, laundry rooms, or entryways, manage moisture and wet coats or umbrellas so water does not repeatedly sit against MDF trim. If swelling, staining, or peeling appears, identify and correct the moisture source before making cosmetic repairs.
Call a professional for suspected water damage, significant wall movement, mold concerns, complicated electrical modifications, or trim work around stairways that requires safe ladder or scaffold access. Building codes vary by jurisdiction, and rules can apply to electrical boxes, egress, fire-rated assemblies, and alterations in multi-family housing. A decorative wall treatment should never compromise a required safety feature or conceal a condition that needs repair.

A DIY board and batten wall also benefits from seasonal observation. Homes expand and contract modestly as humidity and temperature change, so a hairline caulk crack may need a small touch-up over time. Maintaining stable indoor humidity where practical and addressing leaks quickly will help painted trim remain crisp.
Keep a record of the paint color, sheen, trim material, and product names used. That small note makes future touch-ups far easier and helps you match a repair if you later add the treatment to another wall. With a sound layout and careful finish work, the design can remain attractive for years.

Conclusion
A successful DIY board and batten wall is less about complicated carpentry and more about disciplined planning. Choose a proportionate height, calculate balanced spacing, establish a level top rail, and measure every piece at the point where it will be installed. Take time with filling, caulking, sanding, and paint, since those final steps create the continuous, custom look most homeowners want.
Start with one manageable wall, use materials suited to the room’s moisture conditions, and treat electrical and building-code concerns seriously. The result can be a durable, personalized wall treatment that gives an ordinary room more definition and character.
Frequently Asked Questions
What is the easiest material for a DIY board and batten wall?
Primed MDF is easy to cut and paints smoothly in dry, climate-controlled rooms. Finger-jointed pine is a good alternative where more moisture resistance is helpful. Avoid MDF where it may be repeatedly exposed to water.
Should I remove my baseboards before installing board and batten?
Not necessarily. Many installations place vertical battens directly on top of existing baseboards. Remove and replace baseboards only if you want a different profile, need a flush design, or the existing trim is damaged.
How far apart should board and batten spacing be?
Spacing depends on wall width, batten width, and the desired look. Calculate it by subtracting the total batten width from the usable wall width, then dividing the remainder into equal open spaces. Test the layout with painter’s tape before cutting.
Can I install board and batten on textured walls?
Yes, light texture can often be covered successfully. Heavy texture may remain visible between battens and can make caulk lines look uneven. Skim coating or smoothing the wall first produces a more refined result.
Do I need to nail board and batten into studs?
Nailing into studs is best whenever possible, especially for horizontal rails and heavier trim. Construction adhesive can support trim between studs, but it should be used sparingly and in combination with appropriate fasteners.
How do I handle outlets on a board and batten wall?
Keep every electrical box accessible and do not cover it with trim. Cut battens neatly around the box or cover plate as needed. If wall thickness affects the device fit, use approved components or consult a licensed electrician.