
Gardening

How to Compost at Home

Learn how to compost at home with a simple, low-odor system for turning common kitchen and yard materials into useful soil-building compost.
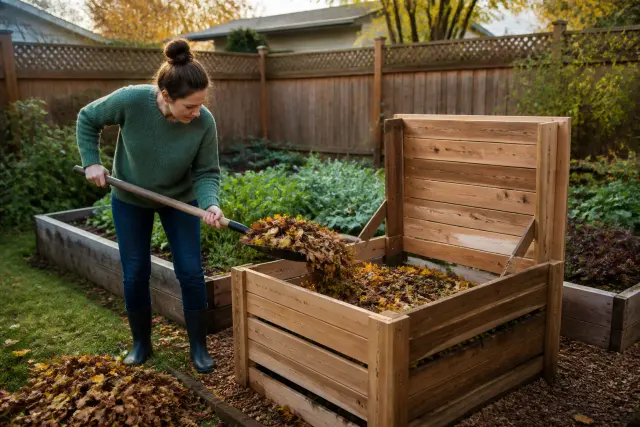
Gardener adding dry leaves to a wooden compost bin in a backyard vegetable garden.

Introduction

Learning how to compost at home is one of the most useful habits a gardener can build. Composting turns many ordinary kitchen and yard materials into a dark, crumbly amendment that helps soil hold moisture, improves texture, and supports healthy plant growth. You do not need a large property, expensive equipment, or a perfectly managed pile to get started.

The basic idea is simple: combine carbon-rich “browns,” such as dry leaves and shredded paper, with nitrogen-rich “greens,” such as vegetable scraps and fresh grass clippings. Give the mix enough moisture and air, then let microorganisms do the work. The best setup is one that fits your space, climate, household routine, and comfort level.

This guide explains how to choose a method, build a balanced pile, prevent common problems, and know when your compost is ready. Start modestly, observe what happens, and adjust as you go. A small working system is far more valuable than an ambitious pile that never gets maintained.
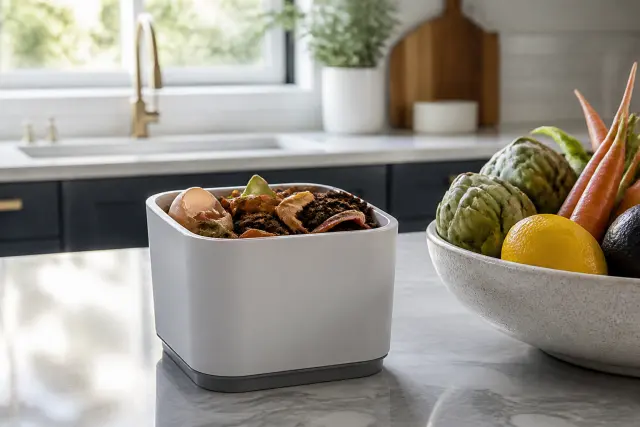
Kitchen compost container with vegetable scraps and coffee grounds near a sunny window.
An easy-to-reach kitchen container makes it more likely that food scraps will reach the compost bin.

1. Understand What Home Composting Does

Composting is controlled decomposition. Bacteria, fungi, insects, and other organisms break down organic materials when they have a reasonable balance of food, moisture, and oxygen. A well-managed active pile may warm up as microbes work, while a slower pile decomposes at outdoor temperatures. Both approaches can make usable compost; the faster one simply requires more attention.

What finished compost can do

Finished compost is not a replacement for every fertilizer need, because its nutrient content varies. Its major value is as organic matter. Work it into garden beds before planting, use it as a light top-dressing around established plants, or blend a modest portion into potting mixes. It can help sandy soil retain water and can help heavy soil become easier to work.

Composting also gives you a thoughtful destination for produce trimmings, coffee grounds, leaves, and other plant-based materials. However, not every biodegradable item belongs in a backyard bin. Successful composting means selecting materials carefully rather than treating the pile as a catch-all.

2. Choose a Method and Location That You Will Use

Your best compost system depends on available space and how much material you generate. An open pile or three-sided bin works well for a yard with regular leaves and garden debris. A lidded stationary bin is tidy and approachable for many suburban homes. A rotating tumbler can be convenient for turning smaller batches, though it may dry out quickly and has limited capacity.

Find a practical site

Place an outdoor bin where you can reach it easily in every season. A level, well-drained spot near the garden is ideal, but avoid placing it directly against a wood fence, house siding, or a neighbor’s property line. Partial shade often keeps a pile from drying too fast in hot regions; in cold areas, a sunnier spot can help maintain warmth. Keep a path to the bin clear so adding scraps does not become a chore.

If you live in an apartment or have no yard, consider a small countertop collection container paired with a municipal organics program, if available. Worm composting can also work indoors when managed correctly. Check building rules before keeping a worm bin on a balcony or in a shared area.

3. Learn the Browns-and-Greens Balance

The simplest compost recipe uses more browns by volume than greens. Browns provide carbon and create air pockets; greens supply nitrogen and moisture. You do not need to measure with laboratory precision. As a practical starting point, add roughly two to three containers of browns for each container of food scraps or fresh green material, then adjust based on what you see and smell.

Useful browns and greens

Material typeGood examplesHelpful preparation
BrownsDry leaves, straw, untreated sawdust in small amounts, shredded plain paper, torn cardboardShred or tear bulky pieces so they break down more evenly.
GreensFruit and vegetable scraps, coffee grounds, tea leaves, fresh grass clippings, plant trimmingsChop large scraps; mix wet materials with dry browns.

Keep a dry stash of leaves, shredded cardboard, or torn paper near the bin. Whenever you add a layer of kitchen scraps, cover it with browns. This easy habit reduces odors, discourages flies, and maintains a more workable mix. Glossy or heavily coated paper is better left out, and paper with unknown inks or treatments is not a dependable compost ingredient.

4. Build Your First Compost Pile

Start with a loose base of twigs or coarse brown material if your bin sits on soil. This encourages airflow at the bottom. Add alternating layers of browns and greens, but do not worry about making perfect, distinct stripes. The goal is an evenly mixed pile with enough dry material to prevent clumps of wet scraps.

Moisten and mix as you build

After adding several layers, lightly moisten the contents. The target is similar to a wrung-out sponge: damp throughout, but not dripping when squeezed. Mix the pile with a garden fork, compost aerator, or shovel. A pile that is at least several feet wide and tall can hold heat more readily, but a smaller bin can still make compost over time.

Cover exposed food scraps with a few inches of browns each time you add them. If your bin has a lid, use it to manage rain and keep animals out, but make sure air can still enter. A sealed container without airflow can become sour and slimy instead of composting efficiently.
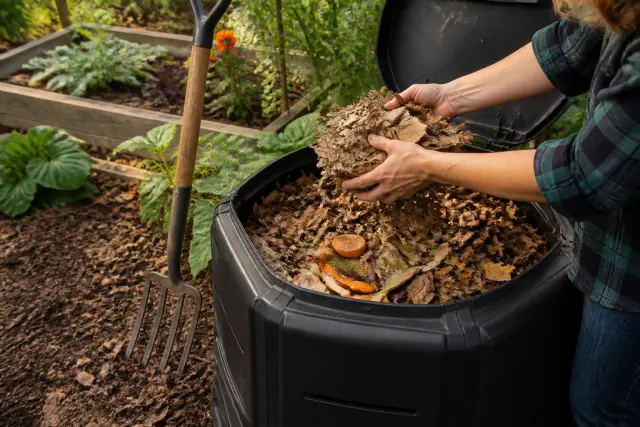
Hands layering food scraps, leaves, and shredded cardboard in a compost bin.
Covering moist kitchen scraps with browns helps maintain airflow and discourages odors.

5. Make Kitchen Scrap Collection Easy

Most compost systems fail because carrying scraps outside feels inconvenient. Put a small, washable container near your food-prep area and empty it regularly. A lid can contain odors, but do not leave moist scraps indoors for long periods. If you cook infrequently or need to wait for pickup day, freeze scraps in a reusable container until you are ready to add them.

Prepare scraps for faster breakdown

Cut large melon rinds, squash skins, and corncobs into smaller pieces before adding them. Smaller pieces offer more surface area for decomposers. Coffee filters made of unbleached paper can usually go in with grounds, while loose tea leaves are straightforward; remove plastic or synthetic tea bags and staples first.

Each time you empty the kitchen container, add a scoop of leaves or shredded cardboard. This routine gives your pile a reliable balance without requiring a special purchase. It also prevents a dense, wet pocket from forming in the center of the bin.

6. Manage Air, Moisture, and Temperature

Check an active compost pile every week or two. Turn it when you have time by moving outer material toward the center and loosening compacted areas. Turning introduces oxygen and redistributes moisture. For a low-maintenance pile, turning less often is fine; expect the process to take longer, especially when materials are coarse or temperatures are cool.

Use simple clues instead of a strict schedule

A pile that smells earthy and feels damp is generally on track. If it looks dry and dusty, mix in water gradually while turning. If water runs out when you squeeze a handful, add dry leaves, shredded cardboard, or other browns and leave the lid off briefly during dry weather. Avoid soaking the pile with a hose; excess water pushes air out of the mix.

In warm weather, an active pile may heat up, which can help break down material quickly. In winter, decomposition slows naturally in much of the United States. Keep adding materials if your bin has room, but do not expect frozen contents to process quickly. Insulating the bin with a thick layer of leaves can help moderate temperature swings.

7. Know What to Leave Out and Compost Safely

For a typical backyard compost pile, leave out meat, fish, dairy products, oils, greasy foods, and cooked foods containing them. These materials can create strong odors and attract rodents, raccoons, and other animals. Also avoid pet waste from dogs and cats, which can contain organisms that are unsafe to handle around edible gardens.

Use caution with yard and household materials

Do not add diseased plants, invasive weeds carrying seeds, or weeds that have gone to seed unless you know your pile reaches and maintains conditions that reliably kill them. Home piles vary greatly, so it is safer to dispose of these materials according to local guidance. Keep treated lumber, coal or charcoal ash, synthetic fabrics, dryer lint, plastics, and chemically contaminated soil out of the compost bin.

Wear gloves when handling an old pile, especially if you have cuts on your hands, and wash up afterward. People with weakened immune systems or serious respiratory sensitivities should use extra care around dusty compost and may prefer to have someone else turn the pile. Never burn compostable materials in the bin or add hot ash.

8. Troubleshoot Odors, Pests, and Slow Progress

A rotten or ammonia-like odor usually means the pile has too many greens, too much water, or too little oxygen. Mix in a generous amount of dry browns and turn the materials to open air channels. Do not merely cover the smell with more scraps. Correcting the wet, compacted center is what restores balance.

Common problems and practical fixes

  • Fruit flies: Bury scraps in the center and cover every addition with browns. Clean the kitchen collection container frequently.
  • Rodents or raccoons: Stop adding restricted foods, use a secure lid or hardware-cloth barrier where appropriate, and keep the area free of spilled scraps.
  • A dry pile: Turn it while adding water a little at a time, then cover exposed material to retain moisture.
  • Little visible change: Chop materials smaller, add some greens if the pile is mostly dry leaves, and turn it to improve contact and airflow.

Persistent pest activity may mean your container is not suited to the materials or setting. Review municipal rules and consider a more secure bin. In dense neighborhoods, an enclosed system and careful food-scrap coverage are especially important.
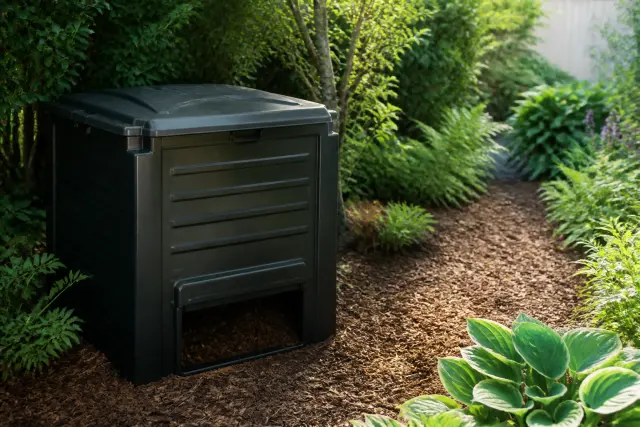
Secure compost bin with dry leaves covering newly added food scraps.
A secure bin and a cover of browns help prevent odors and reduce interest from pests.

9. Recognize and Use Finished Compost

Compost is ready when most original ingredients are no longer recognizable, the material is dark and crumbly, and it has a mild, earthy smell. A few twigs, avocado pits, or dry leaf fragments are normal; screen them out or return them to the next batch. Finished compost should not smell sour, rancid, or strongly like ammonia.

Put it to work in the garden

Spread a one- to two-inch layer over empty garden beds and mix it into the upper soil before planting. Around established shrubs and perennials, spread a thin layer beneath the canopy but keep it several inches away from stems and trunks. For containers, blend compost with other appropriate potting ingredients rather than filling a pot with compost alone, which can be too dense and moisture-retentive.

Let unfinished material keep decomposing instead of applying it around seedlings. Partly decomposed scraps can temporarily tie up nitrogen near roots or harbor pests. If you are unsure, cure the compost in a separate pile or covered container for several weeks while it settles and finishes.

10. Adapt Your System to Climate, Codes, and Your Needs

Climate changes the pace of composting, not the underlying principles. In hot, dry regions, prioritize shade, moisture checks, and a lid that limits evaporation. In humid or rainy areas, protect the pile from becoming saturated and add extra browns. In snowy climates, stockpile dry leaves in fall so you have balancing material when winter kitchen scraps accumulate.

Check local requirements before expanding

City, county, homeowner association, rental, and community-garden rules may address bin placement, setbacks, pests, and outdoor storage. Some communities offer curbside organics collection and specify what belongs in their carts; their accepted-materials list may differ from a home bin. Follow local requirements, particularly if you share walls, fences, or common outdoor spaces.

Consider professional or local extension guidance if you are dealing with contaminated soil, large quantities of diseased plant material, recurring wildlife problems, or a major landscape cleanup. A home compost bin is excellent for routine organic matter, but it is not the right solution for every waste stream.

Keep your routine uncomplicated: collect scraps, add browns, keep the mix damp but airy, and turn it when practical. A compost pile does not need to look perfect to be productive. Observing its smell, texture, and moisture level will teach you more than chasing an exact timetable.

Once your first batch is underway, save leaves and cardboard for the next season and establish a regular place for kitchen scraps. Those small habits make the system dependable through changes in weather, gardening activity, and household schedules.
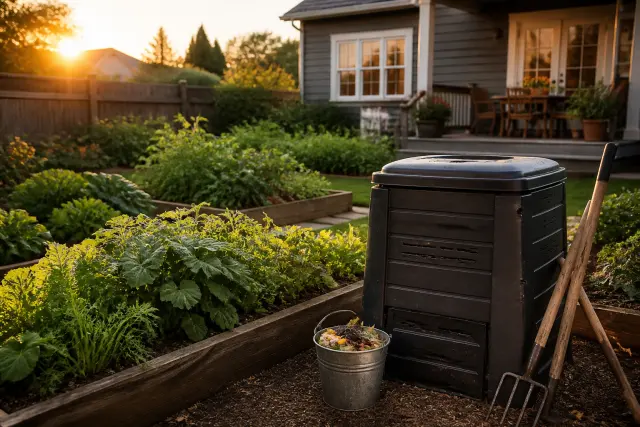
Finished compost bin beside productive vegetable beds in a home garden.
A consistent, simple composting routine supports healthier garden soil season after season.

Conclusion

Home composting is a flexible, low-tech way to turn ordinary organic materials into a valuable resource for your garden. Choose a manageable bin, combine more browns than greens, protect the pile from extremes of wetness or dryness, and avoid materials that invite pests or create safety concerns. With a little attention, your compost will become an important part of healthier soil and a more resilient home garden.

Frequently Asked Questions

Can I compost in a small backyard?

Yes. A compact, lidded compost bin or small tumbler can work well in a small backyard. Use a secure container, add browns with every load of scraps, and avoid meat, dairy, oils, and other pest-attracting materials.

How long does it take to make compost at home?

Timing varies with pile size, materials, weather, moisture, and turning. A frequently turned, balanced pile can break down much faster than a neglected pile, while cold weather and large pieces slow the process. Judge readiness by its dark, crumbly texture and earthy smell rather than a fixed date.

Are coffee grounds good for compost?

Yes. Coffee grounds are a useful green material. Mix them with dry leaves, shredded cardboard, or other browns so they do not form a dense, wet layer.

Can I compost eggshells?

Yes. Rinse eggshells if needed, crush them into small pieces, and add them to the pile. They break down slowly, so crushing helps them disappear more readily into finished compost.

Why does my compost smell bad?

Bad odors usually mean the pile is overly wet, compacted, or too rich in green material. Turn the pile and mix in dry browns such as leaves or shredded cardboard to restore airflow and balance.

Can I add compost directly around vegetable plants?

Use finished, mature compost around vegetable plants as a light top-dressing or work it into beds before planting. Keep it away from stems. Avoid using unfinished compost near young plants because it may continue decomposing and can cause problems around roots.

Gardening

How to Compost at Home

Learn how to compost at home with a simple, low-odor system for turning common kitchen and yard materials into useful soil-building compost.

Gardener adding dry leaves to a wooden compost bin in a backyard vegetable garden.

Introduction

Learning how to compost at home is one of the most useful habits a gardener can build. Composting turns many ordinary kitchen and yard materials into a dark, crumbly amendment that helps soil hold moisture, improves texture, and supports healthy plant growth. You do not need a large property, expensive equipment, or a perfectly managed pile to get started.

The basic idea is simple: combine carbon-rich “browns,” such as dry leaves and shredded paper, with nitrogen-rich “greens,” such as vegetable scraps and fresh grass clippings. Give the mix enough moisture and air, then let microorganisms do the work. The best setup is one that fits your space, climate, household routine, and comfort level.

This guide explains how to choose a method, build a balanced pile, prevent common problems, and know when your compost is ready. Start modestly, observe what happens, and adjust as you go. A small working system is far more valuable than an ambitious pile that never gets maintained.

Kitchen compost container with vegetable scraps and coffee grounds near a sunny window.
An easy-to-reach kitchen container makes it more likely that food scraps will reach the compost bin.

1. Understand What Home Composting Does

Composting is controlled decomposition. Bacteria, fungi, insects, and other organisms break down organic materials when they have a reasonable balance of food, moisture, and oxygen. A well-managed active pile may warm up as microbes work, while a slower pile decomposes at outdoor temperatures. Both approaches can make usable compost; the faster one simply requires more attention.

What finished compost can do

Finished compost is not a replacement for every fertilizer need, because its nutrient content varies. Its major value is as organic matter. Work it into garden beds before planting, use it as a light top-dressing around established plants, or blend a modest portion into potting mixes. It can help sandy soil retain water and can help heavy soil become easier to work.

Composting also gives you a thoughtful destination for produce trimmings, coffee grounds, leaves, and other plant-based materials. However, not every biodegradable item belongs in a backyard bin. Successful composting means selecting materials carefully rather than treating the pile as a catch-all.

2. Choose a Method and Location That You Will Use

Your best compost system depends on available space and how much material you generate. An open pile or three-sided bin works well for a yard with regular leaves and garden debris. A lidded stationary bin is tidy and approachable for many suburban homes. A rotating tumbler can be convenient for turning smaller batches, though it may dry out quickly and has limited capacity.

Find a practical site

Place an outdoor bin where you can reach it easily in every season. A level, well-drained spot near the garden is ideal, but avoid placing it directly against a wood fence, house siding, or a neighbor’s property line. Partial shade often keeps a pile from drying too fast in hot regions; in cold areas, a sunnier spot can help maintain warmth. Keep a path to the bin clear so adding scraps does not become a chore.

If you live in an apartment or have no yard, consider a small countertop collection container paired with a municipal organics program, if available. Worm composting can also work indoors when managed correctly. Check building rules before keeping a worm bin on a balcony or in a shared area.

3. Learn the Browns-and-Greens Balance

The simplest compost recipe uses more browns by volume than greens. Browns provide carbon and create air pockets; greens supply nitrogen and moisture. You do not need to measure with laboratory precision. As a practical starting point, add roughly two to three containers of browns for each container of food scraps or fresh green material, then adjust based on what you see and smell.

Useful browns and greens

Material typeGood examplesHelpful preparation
BrownsDry leaves, straw, untreated sawdust in small amounts, shredded plain paper, torn cardboardShred or tear bulky pieces so they break down more evenly.
GreensFruit and vegetable scraps, coffee grounds, tea leaves, fresh grass clippings, plant trimmingsChop large scraps; mix wet materials with dry browns.

Keep a dry stash of leaves, shredded cardboard, or torn paper near the bin. Whenever you add a layer of kitchen scraps, cover it with browns. This easy habit reduces odors, discourages flies, and maintains a more workable mix. Glossy or heavily coated paper is better left out, and paper with unknown inks or treatments is not a dependable compost ingredient.

4. Build Your First Compost Pile

Start with a loose base of twigs or coarse brown material if your bin sits on soil. This encourages airflow at the bottom. Add alternating layers of browns and greens, but do not worry about making perfect, distinct stripes. The goal is an evenly mixed pile with enough dry material to prevent clumps of wet scraps.

Moisten and mix as you build

After adding several layers, lightly moisten the contents. The target is similar to a wrung-out sponge: damp throughout, but not dripping when squeezed. Mix the pile with a garden fork, compost aerator, or shovel. A pile that is at least several feet wide and tall can hold heat more readily, but a smaller bin can still make compost over time.

Cover exposed food scraps with a few inches of browns each time you add them. If your bin has a lid, use it to manage rain and keep animals out, but make sure air can still enter. A sealed container without airflow can become sour and slimy instead of composting efficiently.

Hands layering food scraps, leaves, and shredded cardboard in a compost bin.
Covering moist kitchen scraps with browns helps maintain airflow and discourages odors.

5. Make Kitchen Scrap Collection Easy

Most compost systems fail because carrying scraps outside feels inconvenient. Put a small, washable container near your food-prep area and empty it regularly. A lid can contain odors, but do not leave moist scraps indoors for long periods. If you cook infrequently or need to wait for pickup day, freeze scraps in a reusable container until you are ready to add them.

Prepare scraps for faster breakdown

Cut large melon rinds, squash skins, and corncobs into smaller pieces before adding them. Smaller pieces offer more surface area for decomposers. Coffee filters made of unbleached paper can usually go in with grounds, while loose tea leaves are straightforward; remove plastic or synthetic tea bags and staples first.

Each time you empty the kitchen container, add a scoop of leaves or shredded cardboard. This routine gives your pile a reliable balance without requiring a special purchase. It also prevents a dense, wet pocket from forming in the center of the bin.

6. Manage Air, Moisture, and Temperature

Check an active compost pile every week or two. Turn it when you have time by moving outer material toward the center and loosening compacted areas. Turning introduces oxygen and redistributes moisture. For a low-maintenance pile, turning less often is fine; expect the process to take longer, especially when materials are coarse or temperatures are cool.

Use simple clues instead of a strict schedule

A pile that smells earthy and feels damp is generally on track. If it looks dry and dusty, mix in water gradually while turning. If water runs out when you squeeze a handful, add dry leaves, shredded cardboard, or other browns and leave the lid off briefly during dry weather. Avoid soaking the pile with a hose; excess water pushes air out of the mix.

In warm weather, an active pile may heat up, which can help break down material quickly. In winter, decomposition slows naturally in much of the United States. Keep adding materials if your bin has room, but do not expect frozen contents to process quickly. Insulating the bin with a thick layer of leaves can help moderate temperature swings.

7. Know What to Leave Out and Compost Safely

For a typical backyard compost pile, leave out meat, fish, dairy products, oils, greasy foods, and cooked foods containing them. These materials can create strong odors and attract rodents, raccoons, and other animals. Also avoid pet waste from dogs and cats, which can contain organisms that are unsafe to handle around edible gardens.

Use caution with yard and household materials

Do not add diseased plants, invasive weeds carrying seeds, or weeds that have gone to seed unless you know your pile reaches and maintains conditions that reliably kill them. Home piles vary greatly, so it is safer to dispose of these materials according to local guidance. Keep treated lumber, coal or charcoal ash, synthetic fabrics, dryer lint, plastics, and chemically contaminated soil out of the compost bin.

Wear gloves when handling an old pile, especially if you have cuts on your hands, and wash up afterward. People with weakened immune systems or serious respiratory sensitivities should use extra care around dusty compost and may prefer to have someone else turn the pile. Never burn compostable materials in the bin or add hot ash.

8. Troubleshoot Odors, Pests, and Slow Progress

A rotten or ammonia-like odor usually means the pile has too many greens, too much water, or too little oxygen. Mix in a generous amount of dry browns and turn the materials to open air channels. Do not merely cover the smell with more scraps. Correcting the wet, compacted center is what restores balance.

Common problems and practical fixes

  • Fruit flies: Bury scraps in the center and cover every addition with browns. Clean the kitchen collection container frequently.
  • Rodents or raccoons: Stop adding restricted foods, use a secure lid or hardware-cloth barrier where appropriate, and keep the area free of spilled scraps.
  • A dry pile: Turn it while adding water a little at a time, then cover exposed material to retain moisture.
  • Little visible change: Chop materials smaller, add some greens if the pile is mostly dry leaves, and turn it to improve contact and airflow.

Persistent pest activity may mean your container is not suited to the materials or setting. Review municipal rules and consider a more secure bin. In dense neighborhoods, an enclosed system and careful food-scrap coverage are especially important.

Secure compost bin with dry leaves covering newly added food scraps.
A secure bin and a cover of browns help prevent odors and reduce interest from pests.

9. Recognize and Use Finished Compost

Compost is ready when most original ingredients are no longer recognizable, the material is dark and crumbly, and it has a mild, earthy smell. A few twigs, avocado pits, or dry leaf fragments are normal; screen them out or return them to the next batch. Finished compost should not smell sour, rancid, or strongly like ammonia.

Put it to work in the garden

Spread a one- to two-inch layer over empty garden beds and mix it into the upper soil before planting. Around established shrubs and perennials, spread a thin layer beneath the canopy but keep it several inches away from stems and trunks. For containers, blend compost with other appropriate potting ingredients rather than filling a pot with compost alone, which can be too dense and moisture-retentive.

Let unfinished material keep decomposing instead of applying it around seedlings. Partly decomposed scraps can temporarily tie up nitrogen near roots or harbor pests. If you are unsure, cure the compost in a separate pile or covered container for several weeks while it settles and finishes.

10. Adapt Your System to Climate, Codes, and Your Needs

Climate changes the pace of composting, not the underlying principles. In hot, dry regions, prioritize shade, moisture checks, and a lid that limits evaporation. In humid or rainy areas, protect the pile from becoming saturated and add extra browns. In snowy climates, stockpile dry leaves in fall so you have balancing material when winter kitchen scraps accumulate.

Check local requirements before expanding

City, county, homeowner association, rental, and community-garden rules may address bin placement, setbacks, pests, and outdoor storage. Some communities offer curbside organics collection and specify what belongs in their carts; their accepted-materials list may differ from a home bin. Follow local requirements, particularly if you share walls, fences, or common outdoor spaces.

Consider professional or local extension guidance if you are dealing with contaminated soil, large quantities of diseased plant material, recurring wildlife problems, or a major landscape cleanup. A home compost bin is excellent for routine organic matter, but it is not the right solution for every waste stream.

Keep your routine uncomplicated: collect scraps, add browns, keep the mix damp but airy, and turn it when practical. A compost pile does not need to look perfect to be productive. Observing its smell, texture, and moisture level will teach you more than chasing an exact timetable.

Once your first batch is underway, save leaves and cardboard for the next season and establish a regular place for kitchen scraps. Those small habits make the system dependable through changes in weather, gardening activity, and household schedules.

Frequently Asked Questions

Can I compost in a small backyard?

Yes. A compact, lidded compost bin or small tumbler can work well in a small backyard. Use a secure container, add browns with every load of scraps, and avoid meat, dairy, oils, and other pest-attracting materials.

How long does it take to make compost at home?

Timing varies with pile size, materials, weather, moisture, and turning. A frequently turned, balanced pile can break down much faster than a neglected pile, while cold weather and large pieces slow the process. Judge readiness by its dark, crumbly texture and earthy smell rather than a fixed date.

Are coffee grounds good for compost?

Yes. Coffee grounds are a useful green material. Mix them with dry leaves, shredded cardboard, or other browns so they do not form a dense, wet layer.

Can I compost eggshells?

Yes. Rinse eggshells if needed, crush them into small pieces, and add them to the pile. They break down slowly, so crushing helps them disappear more readily into finished compost.

Why does my compost smell bad?

Bad odors usually mean the pile is overly wet, compacted, or too rich in green material. Turn the pile and mix in dry browns such as leaves or shredded cardboard to restore airflow and balance.

Can I add compost directly around vegetable plants?

Use finished, mature compost around vegetable plants as a light top-dressing or work it into beds before planting. Keep it away from stems. Avoid using unfinished compost near young plants because it may continue decomposing and can cause problems around roots.

Finished compost bin beside productive vegetable beds in a home garden.
A consistent, simple composting routine supports healthier garden soil season after season.

Conclusion

Home composting is a flexible, low-tech way to turn ordinary organic materials into a valuable resource for your garden. Choose a manageable bin, combine more browns than greens, protect the pile from extremes of wetness or dryness, and avoid materials that invite pests or create safety concerns. With a little attention, your compost will become an important part of healthier soil and a more resilient home garden.