
Gardening

How to Grow Tomatoes

Learn how to grow tomatoes at home with practical guidance on sunlight, soil, planting, watering, support, pest prevention, and harvesting for gardens, raised beds, and containers.
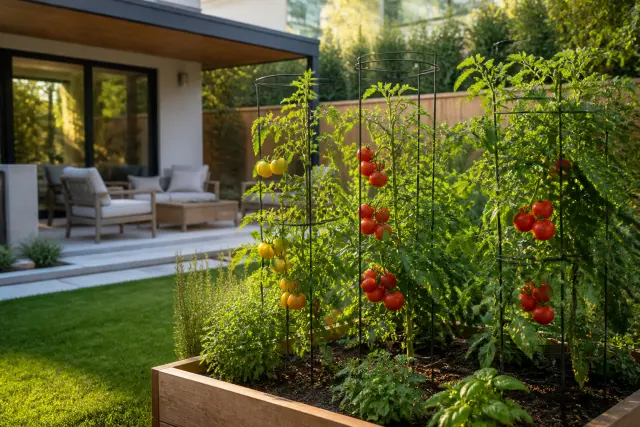
Ripe tomatoes growing on cages in a sunny raised bed at an American backyard home.

Introduction

Learning how to grow tomatoes is one of the most rewarding ways to start a food garden. A single well-tended plant can produce fruit for salads, sandwiches, sauces, and summer snacking, while a small group of plants can keep a household supplied for weeks. Tomatoes are warm-season plants, so success comes from matching their needs—sun, warmth, steady moisture, and support—to the conditions in your yard, patio, balcony, raised bed, or container.

They are forgiving enough for new gardeners, but they are not entirely hands-off. Tomato plants grow quickly, become heavy with fruit, and can develop disease when foliage stays wet or air circulation is poor. Starting with the right location and a few simple routines will prevent many common problems before they begin.

This guide focuses on dependable home-garden practices for U.S. climates. Whether you buy young plants from a local nursery or begin with seeds indoors, use these steps to grow healthier plants and pick ripe tomatoes at their best flavor.
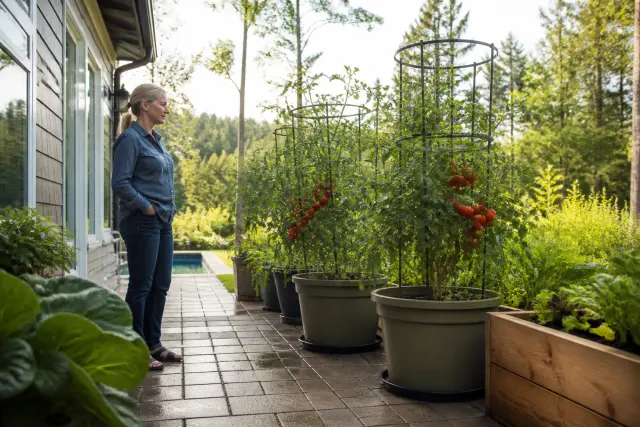
Sunny patio and raised-bed area prepared for growing tomatoes.
Choose a location with ample direct sun and room for mature plants.

1. Choose a Sunny Location and the Right Growing Setup

Tomatoes need full sun: aim for a spot that receives at least six hours of direct sunlight daily, with eight or more hours being ideal in many regions. Morning sun is especially helpful because it dries dew from leaves. Avoid sites shaded by mature trees, fences, or the north side of a building. A bright location with limited direct sun may grow foliage, but it often produces fewer and less flavorful fruits.

You can grow tomatoes in an in-ground bed, raised bed, or large container. In-ground beds offer the most root room, while raised beds warm and drain quickly in spring. Containers are excellent for patios and renters, but they dry out faster and require a generous pot. Choose a container with drainage holes that holds at least 5 gallons for compact types; larger indeterminate plants are usually happier in 10 gallons or more.

Plan for airflow and access

Leave enough room to walk around each plant for watering, tying stems, and harvesting. Crowded plants trap humidity and make fungal leaf problems more likely. Keep containers off poorly drained areas, and avoid placing them directly beneath rooflines where heavy runoff can pound soil and splash dirt onto leaves.

2. Build Healthy, Well-Drained Soil

Tomatoes prefer loose, fertile soil that holds moisture without remaining soggy. Before planting in a garden bed, remove weeds and work a 2- to 3-inch layer of finished compost into the top several inches of soil. Compost improves soil structure and provides a modest, steady source of nutrients. If the ground stays wet after rain, consider a raised bed or mound rather than trying to force tomatoes into a persistently waterlogged site.

Use potting mix in containers

Fill containers with a quality potting mix, not soil dug from the yard. Garden soil can compact in pots, drain poorly, and may carry weed seeds or disease organisms. Refresh or replace container mix each season when practical, especially if a plant had a serious disease problem the previous year.

A soil test is the most reliable way to learn whether a garden bed needs lime, sulfur, or specific nutrients. County Cooperative Extension offices commonly provide local soil-testing information and recommendations. Follow the report instead of adding amendments by guesswork; excessive fertilizer can create lush leaves at the expense of fruit.
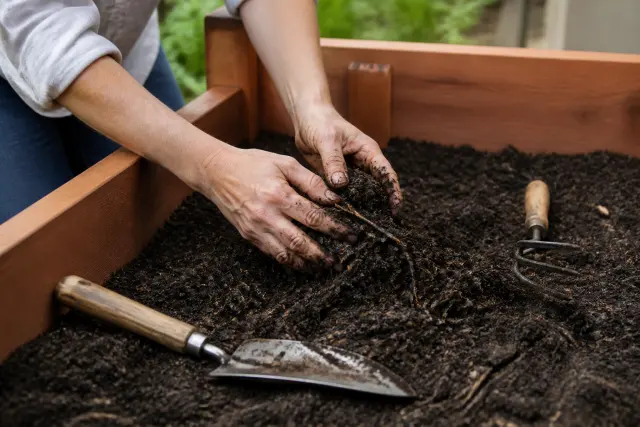
Gardener mixing compost into soil in a raised bed before planting tomatoes.
Loose, compost-enriched soil helps tomato roots establish and drain well.

3. Select Tomato Varieties for Your Space and Climate

Read plant labels carefully before you buy. Determinate tomatoes grow to a more limited size and ripen much of their crop over a shorter window. They are useful for containers, small beds, and gardeners who want a concentrated harvest for canning. Indeterminate tomatoes continue growing and setting fruit until cold weather or disease ends the season, so they need taller, sturdier support.

Choose fruit types based on how you cook and eat. Cherry and grape tomatoes are productive and convenient for snacking. Slicers are classic sandwich tomatoes. Paste tomatoes have meatier flesh suited to sauce. In areas with short summers, look for varieties described as early or short-season. In hot, humid regions, disease-resistant varieties can be a wise choice, but resistance does not eliminate the need for spacing and good sanitation.

Start with healthy transplants

Nursery plants should have sturdy stems, green leaves, and no obvious spots, wilting, insects, or tangled roots circling densely around the pot. Do not worry if a transplant has flowers; remove any damaged leaves, but avoid aggressive pruning at planting time. Healthy plants establish more quickly than oversized, stressed ones.

4. Plant at the Right Time and Depth

Wait to plant outdoors until the danger of frost has passed and soil is warming. Tomatoes dislike chilly conditions; cold soil can stall them even when daytime temperatures seem pleasant. Local planting calendars from your county Extension office, a trusted independent nursery, or your area’s last expected frost date can help with timing. In cooler climates, black plastic mulch or a protected raised bed may help soil warm earlier, but do not rush plants into a cold snap.

Harden off indoor-grown seedlings

If you started seedlings inside, acclimate them for about a week before planting. Set them outdoors in a sheltered, shaded spot for short periods, then gradually increase exposure to sun and wind. Bring them inside if frost is forecast. This process, called hardening off, reduces transplant shock and leaf scorch.

When planting, remove the lower leaves and set the plant deeper than it sat in its nursery pot, leaving several healthy leaves above the soil line. Tomatoes can form roots along buried stem sections, creating a stronger root system. Water the planting hole thoroughly, firm soil gently around the stem, and install stakes or cages right away so you do not disturb roots later.
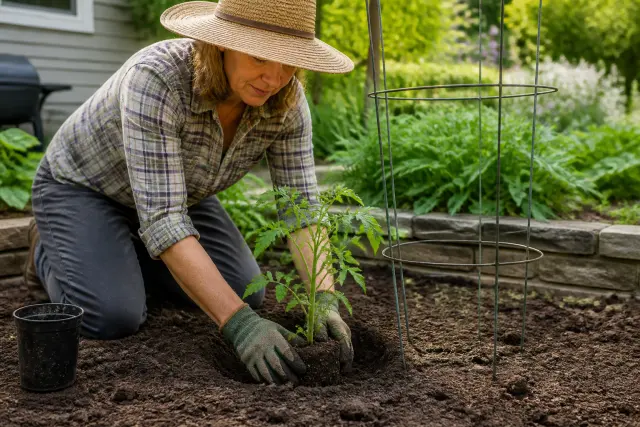
Young tomato plant being set deeply in soil beside a tomato cage.
Plant tomatoes deeply and add support before roots spread.

5. Water Consistently and Mulch the Soil

Inconsistent watering is a major source of tomato trouble. Soak the root zone deeply when the top inch or so of soil feels dry, then let the soil drain. The goal is even moisture, not daily shallow sprinkling. Newly planted tomatoes need close attention while roots establish. Mature plants may need more frequent water during hot, dry, or windy weather, especially in containers.

Water at the base of the plant, preferably early in the day. A drip line, soaker hose, or watering wand directed at the soil keeps foliage drier than overhead watering. Wet leaves are not guaranteed to cause disease, but repeated leaf wetness and splashing soil make it easier for common fungal problems to spread.

Add mulch after the soil warms

Spread a 2- to 3-inch layer of clean straw, shredded leaves, untreated grass clippings, or other organic mulch around plants. Keep it a few inches away from stems. Mulch moderates soil temperature, slows evaporation, suppresses weeds, and reduces soil splash on lower leaves. Check beneath mulch occasionally to make sure water is reaching the root zone.

6. Support Plants and Prune With a Light Touch

Give tomatoes support before they flop. A sturdy tomato cage works well for many determinate varieties. Tall indeterminate plants may need heavy-duty cages, stakes, or a trellis system that can handle full vines and ripe fruit. Push supports firmly into the ground at planting time. In containers, use a cage or stake sized for the expected mature plant and anchored securely in the pot.

Tie stems gently

As plants grow, attach stems to stakes with soft garden ties, cloth strips, or other flexible material. Make a loose loop rather than cinching the stem. Check ties throughout the season because stems thicken quickly. Never use thin wire that can cut into the plant.

Pruning is optional for most home gardeners. Remove leaves that touch the soil and promptly clip off yellow, heavily spotted, or broken foliage. For indeterminate plants trained to a single stake, some gardeners remove small suckers that form in leaf joints to simplify the plant. Do not strip large amounts of healthy foliage, however; leaves protect fruit from sunscald and fuel growth.
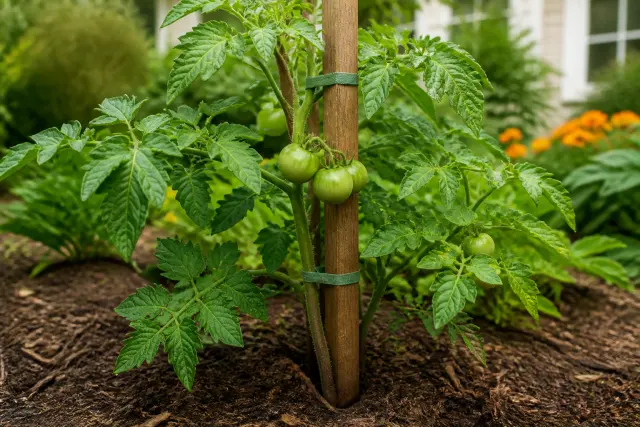
Tomato stem gently tied to a stake above mulched garden soil.
Soft ties and sturdy supports keep fruiting stems off the ground.

7. Feed Sensibly and Watch for Pests and Disease

Tomatoes are productive plants, but more fertilizer is not always better. If you amended the bed with compost and used a balanced fertilizer according to its label, plants may need little additional feeding. Container plants often need more regular nutrition because watering leaches nutrients from potting mix. Use a tomato or vegetable fertilizer as directed, and avoid heavy applications of high-nitrogen products that can encourage excessive leafy growth.

Inspect plants during routine watering

Look under leaves for aphids, hornworms, whiteflies, or clusters of eggs. Handpick large caterpillars when practical, or use the least-toxic control appropriate for the identified pest and follow all label directions. Avoid spraying broad-spectrum insecticides casually, since they can harm beneficial insects and pollinators. If you are unsure what you see, photograph the issue and ask a local Extension office or reputable nursery for identification.

For disease prevention, rotate tomato-family crops to a different area of the garden when possible, remove fallen leaves, and do not compost clearly diseased foliage in a casual backyard pile. Prune only with clean tools, disinfect tools after working with a badly diseased plant, and remove plants that are declining beyond recovery. Some local diseases and pests have specific reporting or disposal guidance, so check regional recommendations when an issue is severe.

8. Harvest Ripe Fruit and Close Out the Season Well

Harvest tomatoes when they have developed their expected color and yield slightly to gentle pressure. Twist or clip fruit from the vine rather than tearing the stem. Pick often to keep plants tidy and to catch fruit before it cracks, overripens, or is damaged by wildlife. Tomatoes develop the best texture and flavor at room temperature, so avoid refrigerating ripe fruit unless it is the only way to prevent spoilage during a short delay.

Handle weather changes thoughtfully

Heavy rain can lead to splitting, particularly after a dry spell. Harvest fruits that are nearly ripe before a major storm if practical. In late season, pick mature green tomatoes before a killing frost and let them finish ripening indoors in a single layer. Do not eat tomatoes damaged by frost, rot, or pests; discard compromised fruit rather than trying to cut around extensive decay.

After the first hard frost or when production has ended, pull plants, remove stakes and cages, and clear plant debris from the bed. Wash reusable supports with soap and water before storage. This simple cleanup reduces overwintering places for pests and disease and gives you a cleaner start next spring.
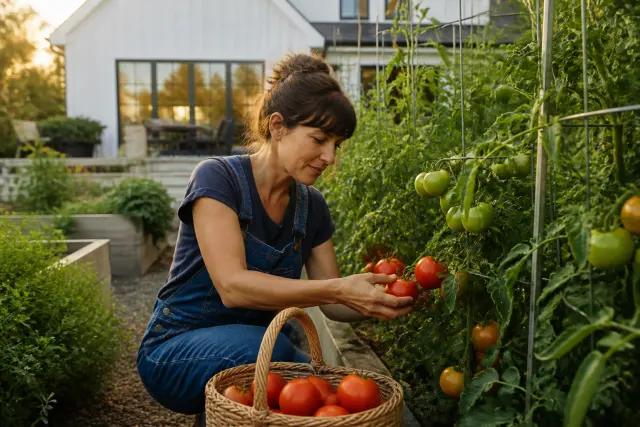
Gardener harvesting ripe tomatoes into a basket from supported garden plants.
Pick tomatoes at peak color and firmness for the best flavor.

Keep a brief garden note while details are fresh: the variety name, planting date, first harvest, major problems, and whether the location received enough sun. These notes are more useful than trying to remember everything next year. They also help you identify varieties that perform well in your own microclimate rather than relying only on a catalog description.

If you garden under a homeowners association, in a shared community space, or near property lines, review applicable rules before adding permanent trellises or tall structures. Call 811 before driving deep posts where underground utilities may be present. For an unusually persistent soil, pest, or disease issue, local Cooperative Extension guidance is often the best source of climate-specific help.
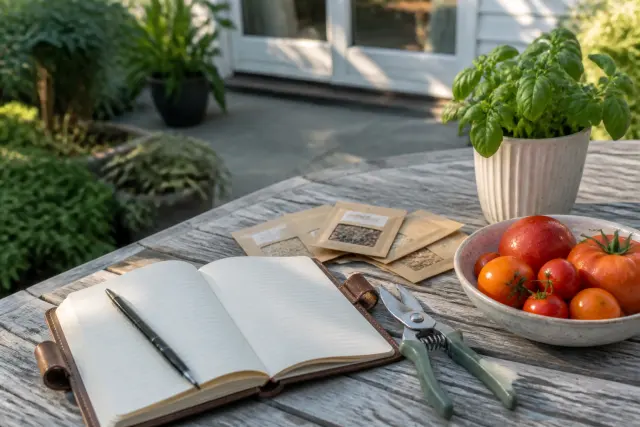
Garden journal and freshly harvested tomatoes on an outdoor patio table.
Simple notes help you improve variety choices and timing next season.

Tomato growing does not need to be perfect to be worthwhile. A few split fruits, a hornworm, or a week of intense heat is normal garden life. Respond with steady care instead of drastic changes: water evenly, remove damaged material, provide support, and give plants time to recover when conditions improve.

Start small if this is your first season. Two or three plants can teach you how sunlight moves across your space, how quickly containers dry, and which tomato flavors your household actually uses. Once you find a reliable routine, expanding the patch becomes much easier.
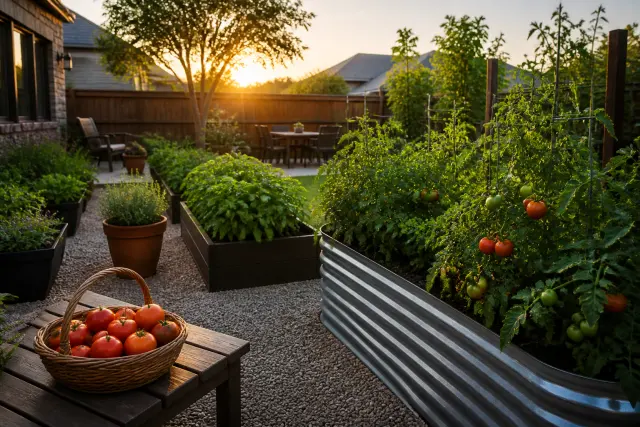
Peaceful backyard tomato garden with a basket of harvested tomatoes at sunset.
A consistent routine can turn a sunny corner into a productive tomato garden.

Conclusion

The core of how to grow tomatoes is simple: choose a sunny site, plant after the weather warms, give roots rich and well-drained soil, water consistently, and support the plant as it grows. Regular observation turns those basics into a successful harvest because you can spot dry soil, pests, and leaf issues before they become larger setbacks.

Grow varieties that fit your space and season, use local guidance when weather or disease patterns are unfamiliar, and keep your end-of-season cleanup routine. With those habits in place, homegrown tomatoes can become one of the most dependable and delicious parts of your summer garden.

Frequently Asked Questions

How many tomato plants should I grow for a small household?

Start with two to four plants. Indeterminate varieties can produce over a long season, while determinate varieties tend to yield more of their crop at once. Your preferred tomato type, local weather, and available space all affect the final harvest.

Can tomatoes grow in partial shade?

Tomatoes may survive in partial shade, but they generally produce best in full sun. Aim for at least six hours of direct sun each day, and expect stronger growth and fruit production with more sunlight.

How often should I water tomato plants?

Water when the top inch or so of soil is dry, soaking the root zone deeply. Frequency depends on heat, rainfall, wind, soil type, and whether plants are in containers. Check container plants especially often during hot weather.

Why are the bottoms of my tomatoes dark and sunken?

This is commonly blossom-end rot, which is often related to uneven soil moisture that interferes with calcium uptake. Maintain consistent watering, mulch the soil, and avoid adding calcium products unless a soil test or local expert indicates a need.

Should I remove tomato suckers?

It is optional. Removing some suckers can make indeterminate plants easier to manage on stakes, but many home gardeners let plants grow naturally in cages. Always remove damaged or diseased foliage and leaves touching the soil.

Can I grow tomatoes in a 5-gallon bucket?

Yes, provided the bucket has adequate drainage holes and is used for a compact or determinate variety. Use potting mix rather than garden soil, add a support, and monitor moisture closely because containers dry faster than garden beds.

Gardening

How to Grow Tomatoes

Learn how to grow tomatoes at home with practical guidance on sunlight, soil, planting, watering, support, pest prevention, and harvesting for gardens, raised beds, and containers.

Ripe tomatoes growing on cages in a sunny raised bed at an American backyard home.

Introduction

Learning how to grow tomatoes is one of the most rewarding ways to start a food garden. A single well-tended plant can produce fruit for salads, sandwiches, sauces, and summer snacking, while a small group of plants can keep a household supplied for weeks. Tomatoes are warm-season plants, so success comes from matching their needs—sun, warmth, steady moisture, and support—to the conditions in your yard, patio, balcony, raised bed, or container.

They are forgiving enough for new gardeners, but they are not entirely hands-off. Tomato plants grow quickly, become heavy with fruit, and can develop disease when foliage stays wet or air circulation is poor. Starting with the right location and a few simple routines will prevent many common problems before they begin.

This guide focuses on dependable home-garden practices for U.S. climates. Whether you buy young plants from a local nursery or begin with seeds indoors, use these steps to grow healthier plants and pick ripe tomatoes at their best flavor.

Sunny patio and raised-bed area prepared for growing tomatoes.
Choose a location with ample direct sun and room for mature plants.

1. Choose a Sunny Location and the Right Growing Setup

Tomatoes need full sun: aim for a spot that receives at least six hours of direct sunlight daily, with eight or more hours being ideal in many regions. Morning sun is especially helpful because it dries dew from leaves. Avoid sites shaded by mature trees, fences, or the north side of a building. A bright location with limited direct sun may grow foliage, but it often produces fewer and less flavorful fruits.

You can grow tomatoes in an in-ground bed, raised bed, or large container. In-ground beds offer the most root room, while raised beds warm and drain quickly in spring. Containers are excellent for patios and renters, but they dry out faster and require a generous pot. Choose a container with drainage holes that holds at least 5 gallons for compact types; larger indeterminate plants are usually happier in 10 gallons or more.

Plan for airflow and access

Leave enough room to walk around each plant for watering, tying stems, and harvesting. Crowded plants trap humidity and make fungal leaf problems more likely. Keep containers off poorly drained areas, and avoid placing them directly beneath rooflines where heavy runoff can pound soil and splash dirt onto leaves.

2. Build Healthy, Well-Drained Soil

Tomatoes prefer loose, fertile soil that holds moisture without remaining soggy. Before planting in a garden bed, remove weeds and work a 2- to 3-inch layer of finished compost into the top several inches of soil. Compost improves soil structure and provides a modest, steady source of nutrients. If the ground stays wet after rain, consider a raised bed or mound rather than trying to force tomatoes into a persistently waterlogged site.

Use potting mix in containers

Fill containers with a quality potting mix, not soil dug from the yard. Garden soil can compact in pots, drain poorly, and may carry weed seeds or disease organisms. Refresh or replace container mix each season when practical, especially if a plant had a serious disease problem the previous year.

A soil test is the most reliable way to learn whether a garden bed needs lime, sulfur, or specific nutrients. County Cooperative Extension offices commonly provide local soil-testing information and recommendations. Follow the report instead of adding amendments by guesswork; excessive fertilizer can create lush leaves at the expense of fruit.

Gardener mixing compost into soil in a raised bed before planting tomatoes.
Loose, compost-enriched soil helps tomato roots establish and drain well.

3. Select Tomato Varieties for Your Space and Climate

Read plant labels carefully before you buy. Determinate tomatoes grow to a more limited size and ripen much of their crop over a shorter window. They are useful for containers, small beds, and gardeners who want a concentrated harvest for canning. Indeterminate tomatoes continue growing and setting fruit until cold weather or disease ends the season, so they need taller, sturdier support.

Choose fruit types based on how you cook and eat. Cherry and grape tomatoes are productive and convenient for snacking. Slicers are classic sandwich tomatoes. Paste tomatoes have meatier flesh suited to sauce. In areas with short summers, look for varieties described as early or short-season. In hot, humid regions, disease-resistant varieties can be a wise choice, but resistance does not eliminate the need for spacing and good sanitation.

Start with healthy transplants

Nursery plants should have sturdy stems, green leaves, and no obvious spots, wilting, insects, or tangled roots circling densely around the pot. Do not worry if a transplant has flowers; remove any damaged leaves, but avoid aggressive pruning at planting time. Healthy plants establish more quickly than oversized, stressed ones.

4. Plant at the Right Time and Depth

Wait to plant outdoors until the danger of frost has passed and soil is warming. Tomatoes dislike chilly conditions; cold soil can stall them even when daytime temperatures seem pleasant. Local planting calendars from your county Extension office, a trusted independent nursery, or your area’s last expected frost date can help with timing. In cooler climates, black plastic mulch or a protected raised bed may help soil warm earlier, but do not rush plants into a cold snap.

Harden off indoor-grown seedlings

If you started seedlings inside, acclimate them for about a week before planting. Set them outdoors in a sheltered, shaded spot for short periods, then gradually increase exposure to sun and wind. Bring them inside if frost is forecast. This process, called hardening off, reduces transplant shock and leaf scorch.

When planting, remove the lower leaves and set the plant deeper than it sat in its nursery pot, leaving several healthy leaves above the soil line. Tomatoes can form roots along buried stem sections, creating a stronger root system. Water the planting hole thoroughly, firm soil gently around the stem, and install stakes or cages right away so you do not disturb roots later.

Young tomato plant being set deeply in soil beside a tomato cage.
Plant tomatoes deeply and add support before roots spread.

5. Water Consistently and Mulch the Soil

Inconsistent watering is a major source of tomato trouble. Soak the root zone deeply when the top inch or so of soil feels dry, then let the soil drain. The goal is even moisture, not daily shallow sprinkling. Newly planted tomatoes need close attention while roots establish. Mature plants may need more frequent water during hot, dry, or windy weather, especially in containers.

Water at the base of the plant, preferably early in the day. A drip line, soaker hose, or watering wand directed at the soil keeps foliage drier than overhead watering. Wet leaves are not guaranteed to cause disease, but repeated leaf wetness and splashing soil make it easier for common fungal problems to spread.

Add mulch after the soil warms

Spread a 2- to 3-inch layer of clean straw, shredded leaves, untreated grass clippings, or other organic mulch around plants. Keep it a few inches away from stems. Mulch moderates soil temperature, slows evaporation, suppresses weeds, and reduces soil splash on lower leaves. Check beneath mulch occasionally to make sure water is reaching the root zone.

6. Support Plants and Prune With a Light Touch

Give tomatoes support before they flop. A sturdy tomato cage works well for many determinate varieties. Tall indeterminate plants may need heavy-duty cages, stakes, or a trellis system that can handle full vines and ripe fruit. Push supports firmly into the ground at planting time. In containers, use a cage or stake sized for the expected mature plant and anchored securely in the pot.

Tie stems gently

As plants grow, attach stems to stakes with soft garden ties, cloth strips, or other flexible material. Make a loose loop rather than cinching the stem. Check ties throughout the season because stems thicken quickly. Never use thin wire that can cut into the plant.

Pruning is optional for most home gardeners. Remove leaves that touch the soil and promptly clip off yellow, heavily spotted, or broken foliage. For indeterminate plants trained to a single stake, some gardeners remove small suckers that form in leaf joints to simplify the plant. Do not strip large amounts of healthy foliage, however; leaves protect fruit from sunscald and fuel growth.

Tomato stem gently tied to a stake above mulched garden soil.
Soft ties and sturdy supports keep fruiting stems off the ground.

7. Feed Sensibly and Watch for Pests and Disease

Tomatoes are productive plants, but more fertilizer is not always better. If you amended the bed with compost and used a balanced fertilizer according to its label, plants may need little additional feeding. Container plants often need more regular nutrition because watering leaches nutrients from potting mix. Use a tomato or vegetable fertilizer as directed, and avoid heavy applications of high-nitrogen products that can encourage excessive leafy growth.

Inspect plants during routine watering

Look under leaves for aphids, hornworms, whiteflies, or clusters of eggs. Handpick large caterpillars when practical, or use the least-toxic control appropriate for the identified pest and follow all label directions. Avoid spraying broad-spectrum insecticides casually, since they can harm beneficial insects and pollinators. If you are unsure what you see, photograph the issue and ask a local Extension office or reputable nursery for identification.

For disease prevention, rotate tomato-family crops to a different area of the garden when possible, remove fallen leaves, and do not compost clearly diseased foliage in a casual backyard pile. Prune only with clean tools, disinfect tools after working with a badly diseased plant, and remove plants that are declining beyond recovery. Some local diseases and pests have specific reporting or disposal guidance, so check regional recommendations when an issue is severe.

8. Harvest Ripe Fruit and Close Out the Season Well

Harvest tomatoes when they have developed their expected color and yield slightly to gentle pressure. Twist or clip fruit from the vine rather than tearing the stem. Pick often to keep plants tidy and to catch fruit before it cracks, overripens, or is damaged by wildlife. Tomatoes develop the best texture and flavor at room temperature, so avoid refrigerating ripe fruit unless it is the only way to prevent spoilage during a short delay.

Handle weather changes thoughtfully

Heavy rain can lead to splitting, particularly after a dry spell. Harvest fruits that are nearly ripe before a major storm if practical. In late season, pick mature green tomatoes before a killing frost and let them finish ripening indoors in a single layer. Do not eat tomatoes damaged by frost, rot, or pests; discard compromised fruit rather than trying to cut around extensive decay.

After the first hard frost or when production has ended, pull plants, remove stakes and cages, and clear plant debris from the bed. Wash reusable supports with soap and water before storage. This simple cleanup reduces overwintering places for pests and disease and gives you a cleaner start next spring.

Gardener harvesting ripe tomatoes into a basket from supported garden plants.
Pick tomatoes at peak color and firmness for the best flavor.

Keep a brief garden note while details are fresh: the variety name, planting date, first harvest, major problems, and whether the location received enough sun. These notes are more useful than trying to remember everything next year. They also help you identify varieties that perform well in your own microclimate rather than relying only on a catalog description.

If you garden under a homeowners association, in a shared community space, or near property lines, review applicable rules before adding permanent trellises or tall structures. Call 811 before driving deep posts where underground utilities may be present. For an unusually persistent soil, pest, or disease issue, local Cooperative Extension guidance is often the best source of climate-specific help.

Garden journal and freshly harvested tomatoes on an outdoor patio table.
Simple notes help you improve variety choices and timing next season.

Tomato growing does not need to be perfect to be worthwhile. A few split fruits, a hornworm, or a week of intense heat is normal garden life. Respond with steady care instead of drastic changes: water evenly, remove damaged material, provide support, and give plants time to recover when conditions improve.

Start small if this is your first season. Two or three plants can teach you how sunlight moves across your space, how quickly containers dry, and which tomato flavors your household actually uses. Once you find a reliable routine, expanding the patch becomes much easier.

Frequently Asked Questions

How many tomato plants should I grow for a small household?

Start with two to four plants. Indeterminate varieties can produce over a long season, while determinate varieties tend to yield more of their crop at once. Your preferred tomato type, local weather, and available space all affect the final harvest.

Can tomatoes grow in partial shade?

Tomatoes may survive in partial shade, but they generally produce best in full sun. Aim for at least six hours of direct sun each day, and expect stronger growth and fruit production with more sunlight.

How often should I water tomato plants?

Water when the top inch or so of soil is dry, soaking the root zone deeply. Frequency depends on heat, rainfall, wind, soil type, and whether plants are in containers. Check container plants especially often during hot weather.

Why are the bottoms of my tomatoes dark and sunken?

This is commonly blossom-end rot, which is often related to uneven soil moisture that interferes with calcium uptake. Maintain consistent watering, mulch the soil, and avoid adding calcium products unless a soil test or local expert indicates a need.

Should I remove tomato suckers?

It is optional. Removing some suckers can make indeterminate plants easier to manage on stakes, but many home gardeners let plants grow naturally in cages. Always remove damaged or diseased foliage and leaves touching the soil.

Can I grow tomatoes in a 5-gallon bucket?

Yes, provided the bucket has adequate drainage holes and is used for a compact or determinate variety. Use potting mix rather than garden soil, add a support, and monitor moisture closely because containers dry faster than garden beds.

Peaceful backyard tomato garden with a basket of harvested tomatoes at sunset.
A consistent routine can turn a sunny corner into a productive tomato garden.

Conclusion

The core of how to grow tomatoes is simple: choose a sunny site, plant after the weather warms, give roots rich and well-drained soil, water consistently, and support the plant as it grows. Regular observation turns those basics into a successful harvest because you can spot dry soil, pests, and leaf issues before they become larger setbacks.

Grow varieties that fit your space and season, use local guidance when weather or disease patterns are unfamiliar, and keep your end-of-season cleanup routine. With those habits in place, homegrown tomatoes can become one of the most dependable and delicious parts of your summer garden.