
Home Improvement

How to Replace Interior Doors

Learn how to replace interior doors with a practical, step-by-step approach to measuring, choosing a slab or prehung door, fitting hinges, hanging the door, and finishing it for a smooth, lasting result.
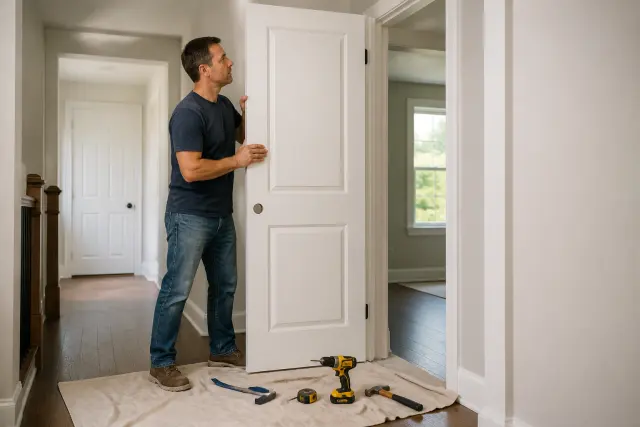
Homeowner preparing to replace a white interior door in a bright hallway.

Introduction

Replacing an interior door can make a bedroom, bathroom, closet, or hallway feel newer without the cost and disruption of a full remodel. A scratched hollow-core door, a dated paneled style, or a door that no longer closes well can all be good reasons to make a change. The job is manageable for a careful DIYer, but success depends less on speed than on accurate measuring, patient fitting, and a willingness to adjust small details.

Before you buy anything, decide whether you are replacing only the door panel or the complete door-and-frame assembly. A slab door is just the door itself and can preserve existing trim and jambs. A prehung door arrives mounted in a new frame, which is useful when the old jamb is damaged, badly out of square, or being moved. This guide explains how to replace interior doors using either path and helps you avoid common fit and finish problems.
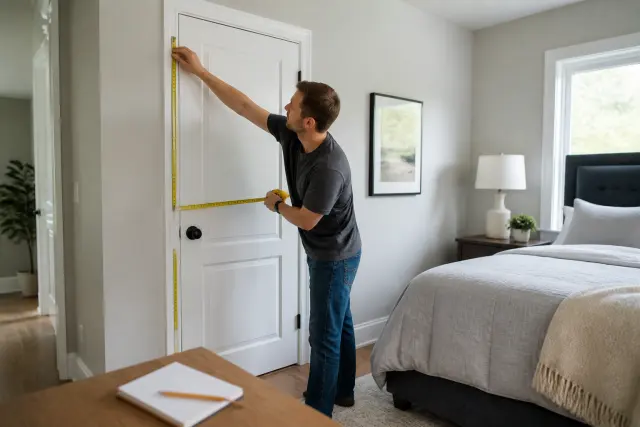
Homeowner measuring an existing bedroom door before replacement.
Measure the existing door and opening in more than one place before ordering a replacement.

1. Decide Between a Slab Door and a Prehung Door

Choose a slab door when the existing jamb is sound, the opening is reasonably square, and you want to keep the surrounding casing intact. It is often the less invasive option, especially in finished rooms. However, transferring hinge locations and drilling the latch bore accurately takes care. A new slab also needs the same width, height, thickness, swing direction, and panel orientation as the old door.

Choose a prehung door when the current frame is split, warped, out of plumb, or incompatible with the replacement style. It is also the better choice for a new opening. Prehung installation requires removing casing and old jamb material, then shimming and fastening the new frame. That adds work, but it gives you a fresh, matched door, hinges, stop, and jamb.

Understand door handing

Door handing describes the hinge side and the way the door swings. Stand on the side from which the door opens toward you: hinges on the right generally indicate a right-hand door, and hinges on the left indicate a left-hand door. Because retailer conventions can vary, confirm the swing diagram on the product listing instead of relying on the label alone. Also check that the open door will not block a walkway, fixture, or adjacent door.

2. Measure the Existing Door and Opening Carefully

For a slab replacement, remove the old door and measure its width, height, and thickness in several places. Many interior doors are nominally 1 3/8 inches thick, but never assume. Measure the hinge leaf height and width, the distance from the top of the door to each hinge, and the backset of the latch. Photograph the hinge and strike locations before disassembly; the pictures can prevent mix-ups later.

For a prehung replacement, measure the rough opening after removing trim or an old unit. Measure width at the top, middle, and bottom, and measure height on both sides and at the center. Use the smallest dimension when evaluating the opening. A rough opening must leave room for the frame and shims; follow the manufacturer’s stated rough-opening requirement for the specific unit you purchase.

Check the floor and jamb condition

Place a long level against both jamb legs and across the header. Note whether the opening leans, twists, or narrows. Check finished-floor height too: new flooring, thick rugs, or an uneven threshold can change the needed bottom clearance. Interior doors usually need a small, even gap around the edges and enough clearance at the bottom to swing freely. Bathroom doors may need an undercut for airflow, particularly where ventilation is limited.
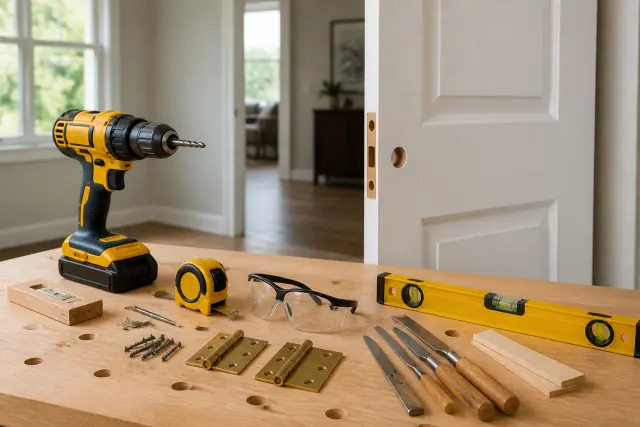
Tools and safety gear arranged for an interior door replacement project.
Gather fitting, fastening, and safety tools before removing the old door.

3. Gather Tools, Hardware, and Safety Gear

A slab-door project commonly requires a tape measure, combination square, utility knife, drill/driver, drill bits, hinge screws, chisels, hammer, screwdriver, sanding block, clamps, and a sharp pencil. A hinge mortising template and router can speed repetitive work, but a chisel works well when used carefully. For a new latch bore, use an appropriate hole saw and a guide or jig to keep the cut centered and straight.

Prehung installation adds a level, long straightedge, shims, pry bar, finish nailer or hammer and finish nails, screws long enough to reach framing at hinge locations, and low-expansion door-and-window foam if needed. Wear eye protection when drilling, chiseling, cutting shims, or prying. Use hearing protection with power tools, and wear a dust mask when sanding old paint or cutting engineered wood products.

Protect yourself and the room

Interior doors can be awkward even when they are lightweight. Have a helper available for lifting a solid-core or oversized door. Keep hands clear of the hinge gap, support the door on a stable work surface, and do not balance it vertically without securing it. In homes built before 1978, take appropriate lead-safe precautions before disturbing paint on old trim, doors, or jambs.

4. Remove the Old Door Without Damaging the Opening

Close the door partway and place a wood shim or folded cardboard beneath the latch side to support its weight. Tap the hinge pins upward with a nail set or screwdriver and hammer, beginning at the bottom hinge. Once the pins are out, lift the door away with a helper. Label the door’s top edge and hinge side if you plan to use it as a template.

For a slab replacement, remove old hinges, latch hardware, and the strike plate. Inspect screw holes in the jamb. Stripped holes can often be repaired with glued wood plugs or toothpicks, trimmed flush after the glue cures, then predrilled for new screws. Avoid simply using larger screws if they could interfere with the jamb or framing.

Removing a complete prehung unit

To replace the entire unit, score paint or caulk lines around the casing first to reduce wall damage. Pry off casing gradually using a wide putty knife or scrap wood behind the pry bar. Cut or remove fasteners, then lift out the old frame. Check the rough opening for loose framing, water damage, or electrical wiring before driving new fasteners. Repair structural or moisture-related issues before proceeding.
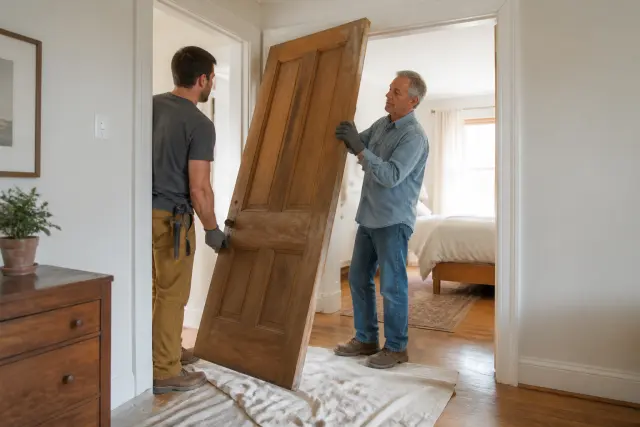
Two people safely removing an old interior door from its hinges.
Support the door before removing hinge pins to protect the floor, door, and your hands.

5. Fit and Mark a Replacement Slab Door

Lay the old and new slabs flat on padded sawhorses, with their tops aligned and faces oriented the same way. Transfer the old door’s outline only after confirming that the old door itself was not oversized, warped, or improperly trimmed. If the new slab needs minor trimming, mark the cut line with a knife and straightedge. Remove material evenly and sparingly; it is easy to take more off, but impossible to put it back.

Most factory doors have limits on how much can be trimmed from each edge. Read the manufacturer’s instructions before cutting, especially for hollow-core, molded composite, or fire-rated products. Cutting too much from a hollow-core door can expose its internal construction. Never alter a labeled fire-rated door unless the manufacturer specifically permits the modification; fire doors and their hardware can be subject to local code requirements.

Make clean cuts and seal raw edges

Use a fine-tooth blade, support the door well, and score the finish face to reduce tear-out. Sand the cut edge smooth and test-fit the slab in the opening before cutting again. After final fitting, seal exposed wood or composite edges with the appropriate primer or paint. Sealing is particularly important in humid bathrooms, laundry rooms, and coastal climates, where unprotected edges can absorb moisture and swell.

6. Mortise Hinges and Hang the Slab

Mark hinge positions from the old door onto the new slab, using a square to carry the marks across the edge. Set each hinge leaf on the door edge, trace its outline with a knife, and score the perimeter. Carefully chisel shallow layers within the outline until the hinge leaf sits flush. A hinge that stands proud can bind; a mortise that is too deep can create a loose, uneven reveal.

Fasten hinges to the door with the correct screws, then support the door in the opening with shims placed under its bottom edge. Align hinge leaves with the jamb mortises and install one screw in each hinge first. Test the swing before installing the remaining screws. Replace one short screw in the top hinge with a longer screw that reaches framing when possible, but predrill and ensure it will not pull the jamb out of alignment.

Read the gaps before making adjustments

Close the door and examine the reveal around all sides. A tight top corner may indicate a hinge that is too deep or a jamb that is out of plumb. A latch-side gap that changes from top to bottom can point to hinge placement or frame alignment. Make one small adjustment at a time, then retest. Repeatedly planing the latch edge before checking hinges is a frequent and avoidable mistake.
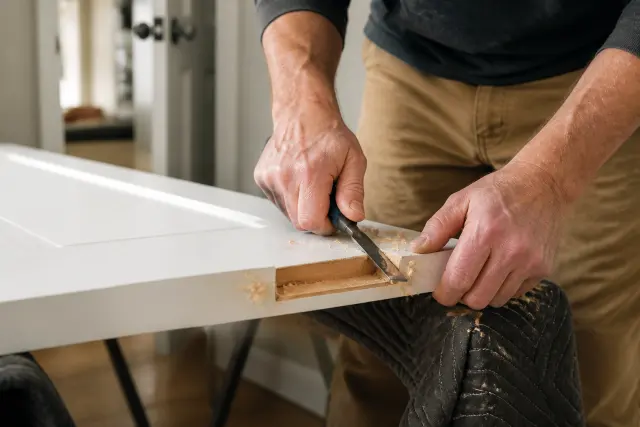
DIY homeowner mortising a hinge recess into a new interior slab door.
A flush, carefully sized hinge mortise helps the door swing and close correctly.

7. Install and Shim a New Prehung Door

Set the prehung unit into the rough opening with the door closed and temporary shipping braces removed only as directed by the manufacturer. Start by shimming behind the hinge-side jamb near each hinge. Use a level to make that jamb plumb, then drive fasteners through the jamb and shims into framing. Check that the frame remains straight as you work; overdriven fasteners can bow the jamb.

Next, shim the header and latch-side jamb while checking the reveal around the closed door. The gap should look consistent, and the latch side should be positioned so the latch meets the strike cleanly. Drive fasteners gradually, opening and closing the door often. Trim shims flush only after the door operates properly. If the opening is unusually crooked, a carpenter can assess whether framing corrections are needed instead of forcing the jamb to compensate.

Insulate without bowing the frame

For rooms where sound control or temperature differences matter, lightly fill the space between jamb and framing with low-expansion foam made for doors and windows, or use loose insulation. Use only a small amount and allow it to cure before trimming. Standard expanding foam can distort a jamb and cause the door to stick. Interior doors generally do not require exterior-style weatherproofing, but conditioned garages and other special separations may have code-specific requirements.

8. Add the Latch, Strike Plate, and Door Hardware

Mark the latch height from the old door or choose a comfortable, consistent height that aligns with nearby doors. Drill the edge bore and face bore according to the hardware template, keeping the drill perpendicular to the surface. Install the latch with its beveled face pointing toward the strike side so the door can close smoothly. Tighten screws firmly but do not overtighten and crush lightweight door material.

With the door nearly closed, mark where the latch contacts the jamb. Position the strike plate, trace it, and mortise only as deeply as needed for the plate to sit flush. Drill or chisel the strike opening deep enough for the latch to engage. Test the latch several times. If it rubs high or low, reposition the strike plate rather than bending the latch or forcing the door shut.

Choose privacy hardware thoughtfully

Bedrooms and bathrooms typically use privacy sets with an emergency-release feature on the exterior. Closets usually need a passage knob or pull without a lock. Where accessibility is a concern, lever handles are generally easier to operate than round knobs. In rental housing, multifamily properties, or homes with a required egress path, check applicable local requirements before changing locking hardware or modifying a door that serves a safety function.
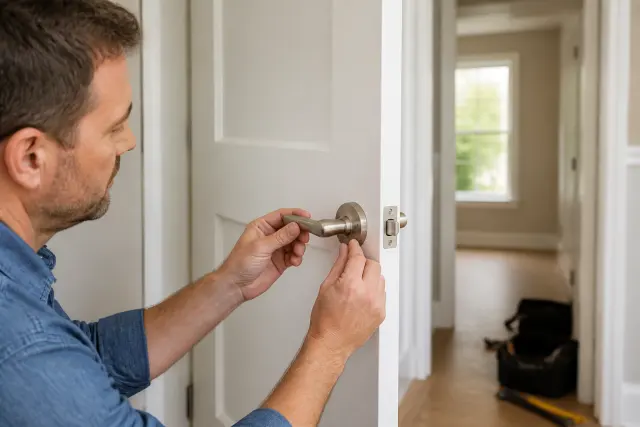
Homeowner installing lever hardware on a new white interior door.
Install the latch and strike plate only after the door hangs with even gaps.

9. Finish, Maintain, and Know When to Call a Pro

Remove hardware or mask it carefully before painting. Prime bare wood, patched areas, and cut edges, then apply a durable interior paint suitable for doors and trim. Let each coat cure according to its label before frequent use. If you stain a wood door, test the finish on an inconspicuous area first; wood species and veneer can absorb stain unevenly. Reinstall hardware only after the finish is dry enough to resist marking.

Maintain the door by tightening loose hinge screws, cleaning the latch, and touching up chipped finish before moisture reaches the substrate. Seasonal humidity can cause wood doors to expand slightly, especially in damp climates. Run bathroom exhaust fans during and after showers, keep indoor humidity reasonably controlled, and avoid aggressive planing unless the problem persists across seasons. A persistent sag, split jamb, or major floor-related clearance issue deserves diagnosis rather than a quick cosmetic fix.

When professional help is the safer choice

Call a qualified carpenter or door installer for structural framing damage, extensive rot, a severely out-of-square opening, a heavy solid-wood door, or a fire-rated assembly. Seek licensed professional help when electrical wiring, plumbing, or ventilation components are discovered in the wall. Local building departments can clarify permit or code questions for work involving garage-to-house doors, rated doors, or changes to an opening. Those situations require more than ordinary interior-door installation techniques.
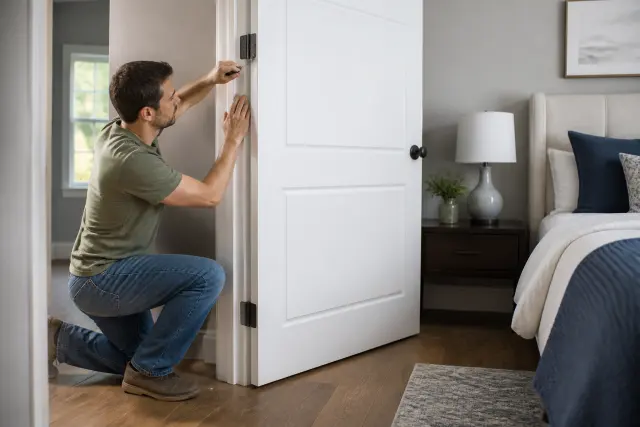
Homeowner making a final adjustment to a newly installed interior door.
A final adjustment ensures the door swings freely and latches without force.

A successful replacement should open quietly, stay where you place it, latch without force, and show an even reveal. Take a final slow look at both faces of the closed door in natural light. Small flaws in paint, trim caulk, or strike alignment are easiest to correct now, before the room returns to everyday use.

Save the hardware instructions, paint details, and any spare screws or shims in a labeled bag. This simple record helps with future adjustments and keeps finishes consistent if you replace additional doors. Working one door at a time also makes it easier to refine your method before tackling a whole hallway.
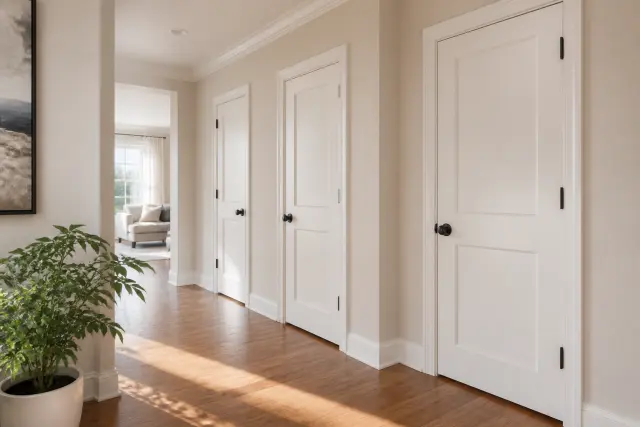
Finished interior doors creating a polished look in a modern home hallway.
Well-fitted interior doors bring function, privacy, and a finished look to everyday rooms.

Conclusion

Learning how to replace interior doors starts with choosing the right type of replacement and measuring with precision. A slab door can be an efficient upgrade when the jamb is in good condition, while a prehung unit gives you a clean reset when the frame is the problem. Work slowly through fitting, hinge alignment, hardware installation, and finishing, and test the door at every stage. With careful preparation and a willingness to call a professional for structural, rated, or code-sensitive work, an interior door replacement can deliver a durable, polished upgrade.

Frequently Asked Questions

Can I replace an interior door without replacing the frame?

Yes. A slab door can replace the door panel while keeping the existing jamb and trim, provided the frame is sound and the opening is not badly out of square. You will need to match the old door’s size, thickness, hinge locations, swing, and hardware placement.

Should I buy a hollow-core or solid-core interior door?

Hollow-core doors are lighter, less expensive, and common for closets and low-noise areas. Solid-core doors offer better sound reduction and a more substantial feel, making them a popular choice for bedrooms, offices, and bathrooms. Confirm that existing hinges and framing can support the added weight of a solid-core door.

How much clearance should an interior door have?

The door should have a small, even reveal around the top and sides and enough bottom clearance to swing without rubbing the finished floor or rugs. Exact needs vary with flooring, ventilation, and local conditions, so test the door in its actual opening before final trimming.

Why does my new interior door rub at the top?

A top rub often comes from a hinge that is too deeply mortised, loose hinge screws, a door that is sagging, or a jamb that is not plumb. Check hinge seating and screw tightness first, then inspect the reveal before removing material from the door edge.

Can I cut down a new interior door?

Often, but only within the manufacturer’s stated trimming limits. Hollow-core, molded, veneer, and fire-rated doors can have important restrictions. Make small cuts, use a fine-tooth blade, and seal any raw edges after cutting.

Do I need a permit to replace an interior door?

A straightforward like-for-like interior door replacement often does not require a permit, but requirements are local. Ask your building department if the project changes the opening or involves a garage separation, a fire-rated door, accessibility requirements, or another code-regulated assembly.

Home Improvement

How to Replace Interior Doors

Learn how to replace interior doors with a practical, step-by-step approach to measuring, choosing a slab or prehung door, fitting hinges, hanging the door, and finishing it for a smooth, lasting result.

Homeowner preparing to replace a white interior door in a bright hallway.

Introduction

Replacing an interior door can make a bedroom, bathroom, closet, or hallway feel newer without the cost and disruption of a full remodel. A scratched hollow-core door, a dated paneled style, or a door that no longer closes well can all be good reasons to make a change. The job is manageable for a careful DIYer, but success depends less on speed than on accurate measuring, patient fitting, and a willingness to adjust small details.

Before you buy anything, decide whether you are replacing only the door panel or the complete door-and-frame assembly. A slab door is just the door itself and can preserve existing trim and jambs. A prehung door arrives mounted in a new frame, which is useful when the old jamb is damaged, badly out of square, or being moved. This guide explains how to replace interior doors using either path and helps you avoid common fit and finish problems.

Homeowner measuring an existing bedroom door before replacement.
Measure the existing door and opening in more than one place before ordering a replacement.

1. Decide Between a Slab Door and a Prehung Door

Choose a slab door when the existing jamb is sound, the opening is reasonably square, and you want to keep the surrounding casing intact. It is often the less invasive option, especially in finished rooms. However, transferring hinge locations and drilling the latch bore accurately takes care. A new slab also needs the same width, height, thickness, swing direction, and panel orientation as the old door.

Choose a prehung door when the current frame is split, warped, out of plumb, or incompatible with the replacement style. It is also the better choice for a new opening. Prehung installation requires removing casing and old jamb material, then shimming and fastening the new frame. That adds work, but it gives you a fresh, matched door, hinges, stop, and jamb.

Understand door handing

Door handing describes the hinge side and the way the door swings. Stand on the side from which the door opens toward you: hinges on the right generally indicate a right-hand door, and hinges on the left indicate a left-hand door. Because retailer conventions can vary, confirm the swing diagram on the product listing instead of relying on the label alone. Also check that the open door will not block a walkway, fixture, or adjacent door.

2. Measure the Existing Door and Opening Carefully

For a slab replacement, remove the old door and measure its width, height, and thickness in several places. Many interior doors are nominally 1 3/8 inches thick, but never assume. Measure the hinge leaf height and width, the distance from the top of the door to each hinge, and the backset of the latch. Photograph the hinge and strike locations before disassembly; the pictures can prevent mix-ups later.

For a prehung replacement, measure the rough opening after removing trim or an old unit. Measure width at the top, middle, and bottom, and measure height on both sides and at the center. Use the smallest dimension when evaluating the opening. A rough opening must leave room for the frame and shims; follow the manufacturer’s stated rough-opening requirement for the specific unit you purchase.

Check the floor and jamb condition

Place a long level against both jamb legs and across the header. Note whether the opening leans, twists, or narrows. Check finished-floor height too: new flooring, thick rugs, or an uneven threshold can change the needed bottom clearance. Interior doors usually need a small, even gap around the edges and enough clearance at the bottom to swing freely. Bathroom doors may need an undercut for airflow, particularly where ventilation is limited.

Tools and safety gear arranged for an interior door replacement project.
Gather fitting, fastening, and safety tools before removing the old door.

3. Gather Tools, Hardware, and Safety Gear

A slab-door project commonly requires a tape measure, combination square, utility knife, drill/driver, drill bits, hinge screws, chisels, hammer, screwdriver, sanding block, clamps, and a sharp pencil. A hinge mortising template and router can speed repetitive work, but a chisel works well when used carefully. For a new latch bore, use an appropriate hole saw and a guide or jig to keep the cut centered and straight.

Prehung installation adds a level, long straightedge, shims, pry bar, finish nailer or hammer and finish nails, screws long enough to reach framing at hinge locations, and low-expansion door-and-window foam if needed. Wear eye protection when drilling, chiseling, cutting shims, or prying. Use hearing protection with power tools, and wear a dust mask when sanding old paint or cutting engineered wood products.

Protect yourself and the room

Interior doors can be awkward even when they are lightweight. Have a helper available for lifting a solid-core or oversized door. Keep hands clear of the hinge gap, support the door on a stable work surface, and do not balance it vertically without securing it. In homes built before 1978, take appropriate lead-safe precautions before disturbing paint on old trim, doors, or jambs.

4. Remove the Old Door Without Damaging the Opening

Close the door partway and place a wood shim or folded cardboard beneath the latch side to support its weight. Tap the hinge pins upward with a nail set or screwdriver and hammer, beginning at the bottom hinge. Once the pins are out, lift the door away with a helper. Label the door’s top edge and hinge side if you plan to use it as a template.

For a slab replacement, remove old hinges, latch hardware, and the strike plate. Inspect screw holes in the jamb. Stripped holes can often be repaired with glued wood plugs or toothpicks, trimmed flush after the glue cures, then predrilled for new screws. Avoid simply using larger screws if they could interfere with the jamb or framing.

Removing a complete prehung unit

To replace the entire unit, score paint or caulk lines around the casing first to reduce wall damage. Pry off casing gradually using a wide putty knife or scrap wood behind the pry bar. Cut or remove fasteners, then lift out the old frame. Check the rough opening for loose framing, water damage, or electrical wiring before driving new fasteners. Repair structural or moisture-related issues before proceeding.

Two people safely removing an old interior door from its hinges.
Support the door before removing hinge pins to protect the floor, door, and your hands.

5. Fit and Mark a Replacement Slab Door

Lay the old and new slabs flat on padded sawhorses, with their tops aligned and faces oriented the same way. Transfer the old door’s outline only after confirming that the old door itself was not oversized, warped, or improperly trimmed. If the new slab needs minor trimming, mark the cut line with a knife and straightedge. Remove material evenly and sparingly; it is easy to take more off, but impossible to put it back.

Most factory doors have limits on how much can be trimmed from each edge. Read the manufacturer’s instructions before cutting, especially for hollow-core, molded composite, or fire-rated products. Cutting too much from a hollow-core door can expose its internal construction. Never alter a labeled fire-rated door unless the manufacturer specifically permits the modification; fire doors and their hardware can be subject to local code requirements.

Make clean cuts and seal raw edges

Use a fine-tooth blade, support the door well, and score the finish face to reduce tear-out. Sand the cut edge smooth and test-fit the slab in the opening before cutting again. After final fitting, seal exposed wood or composite edges with the appropriate primer or paint. Sealing is particularly important in humid bathrooms, laundry rooms, and coastal climates, where unprotected edges can absorb moisture and swell.

6. Mortise Hinges and Hang the Slab

Mark hinge positions from the old door onto the new slab, using a square to carry the marks across the edge. Set each hinge leaf on the door edge, trace its outline with a knife, and score the perimeter. Carefully chisel shallow layers within the outline until the hinge leaf sits flush. A hinge that stands proud can bind; a mortise that is too deep can create a loose, uneven reveal.

Fasten hinges to the door with the correct screws, then support the door in the opening with shims placed under its bottom edge. Align hinge leaves with the jamb mortises and install one screw in each hinge first. Test the swing before installing the remaining screws. Replace one short screw in the top hinge with a longer screw that reaches framing when possible, but predrill and ensure it will not pull the jamb out of alignment.

Read the gaps before making adjustments

Close the door and examine the reveal around all sides. A tight top corner may indicate a hinge that is too deep or a jamb that is out of plumb. A latch-side gap that changes from top to bottom can point to hinge placement or frame alignment. Make one small adjustment at a time, then retest. Repeatedly planing the latch edge before checking hinges is a frequent and avoidable mistake.

DIY homeowner mortising a hinge recess into a new interior slab door.
A flush, carefully sized hinge mortise helps the door swing and close correctly.

7. Install and Shim a New Prehung Door

Set the prehung unit into the rough opening with the door closed and temporary shipping braces removed only as directed by the manufacturer. Start by shimming behind the hinge-side jamb near each hinge. Use a level to make that jamb plumb, then drive fasteners through the jamb and shims into framing. Check that the frame remains straight as you work; overdriven fasteners can bow the jamb.

Next, shim the header and latch-side jamb while checking the reveal around the closed door. The gap should look consistent, and the latch side should be positioned so the latch meets the strike cleanly. Drive fasteners gradually, opening and closing the door often. Trim shims flush only after the door operates properly. If the opening is unusually crooked, a carpenter can assess whether framing corrections are needed instead of forcing the jamb to compensate.

Insulate without bowing the frame

For rooms where sound control or temperature differences matter, lightly fill the space between jamb and framing with low-expansion foam made for doors and windows, or use loose insulation. Use only a small amount and allow it to cure before trimming. Standard expanding foam can distort a jamb and cause the door to stick. Interior doors generally do not require exterior-style weatherproofing, but conditioned garages and other special separations may have code-specific requirements.

8. Add the Latch, Strike Plate, and Door Hardware

Mark the latch height from the old door or choose a comfortable, consistent height that aligns with nearby doors. Drill the edge bore and face bore according to the hardware template, keeping the drill perpendicular to the surface. Install the latch with its beveled face pointing toward the strike side so the door can close smoothly. Tighten screws firmly but do not overtighten and crush lightweight door material.

With the door nearly closed, mark where the latch contacts the jamb. Position the strike plate, trace it, and mortise only as deeply as needed for the plate to sit flush. Drill or chisel the strike opening deep enough for the latch to engage. Test the latch several times. If it rubs high or low, reposition the strike plate rather than bending the latch or forcing the door shut.

Choose privacy hardware thoughtfully

Bedrooms and bathrooms typically use privacy sets with an emergency-release feature on the exterior. Closets usually need a passage knob or pull without a lock. Where accessibility is a concern, lever handles are generally easier to operate than round knobs. In rental housing, multifamily properties, or homes with a required egress path, check applicable local requirements before changing locking hardware or modifying a door that serves a safety function.

Homeowner installing lever hardware on a new white interior door.
Install the latch and strike plate only after the door hangs with even gaps.

9. Finish, Maintain, and Know When to Call a Pro

Remove hardware or mask it carefully before painting. Prime bare wood, patched areas, and cut edges, then apply a durable interior paint suitable for doors and trim. Let each coat cure according to its label before frequent use. If you stain a wood door, test the finish on an inconspicuous area first; wood species and veneer can absorb stain unevenly. Reinstall hardware only after the finish is dry enough to resist marking.

Maintain the door by tightening loose hinge screws, cleaning the latch, and touching up chipped finish before moisture reaches the substrate. Seasonal humidity can cause wood doors to expand slightly, especially in damp climates. Run bathroom exhaust fans during and after showers, keep indoor humidity reasonably controlled, and avoid aggressive planing unless the problem persists across seasons. A persistent sag, split jamb, or major floor-related clearance issue deserves diagnosis rather than a quick cosmetic fix.

When professional help is the safer choice

Call a qualified carpenter or door installer for structural framing damage, extensive rot, a severely out-of-square opening, a heavy solid-wood door, or a fire-rated assembly. Seek licensed professional help when electrical wiring, plumbing, or ventilation components are discovered in the wall. Local building departments can clarify permit or code questions for work involving garage-to-house doors, rated doors, or changes to an opening. Those situations require more than ordinary interior-door installation techniques.

Homeowner making a final adjustment to a newly installed interior door.
A final adjustment ensures the door swings freely and latches without force.

A successful replacement should open quietly, stay where you place it, latch without force, and show an even reveal. Take a final slow look at both faces of the closed door in natural light. Small flaws in paint, trim caulk, or strike alignment are easiest to correct now, before the room returns to everyday use.

Save the hardware instructions, paint details, and any spare screws or shims in a labeled bag. This simple record helps with future adjustments and keeps finishes consistent if you replace additional doors. Working one door at a time also makes it easier to refine your method before tackling a whole hallway.

Frequently Asked Questions

Can I replace an interior door without replacing the frame?

Yes. A slab door can replace the door panel while keeping the existing jamb and trim, provided the frame is sound and the opening is not badly out of square. You will need to match the old door’s size, thickness, hinge locations, swing, and hardware placement.

Should I buy a hollow-core or solid-core interior door?

Hollow-core doors are lighter, less expensive, and common for closets and low-noise areas. Solid-core doors offer better sound reduction and a more substantial feel, making them a popular choice for bedrooms, offices, and bathrooms. Confirm that existing hinges and framing can support the added weight of a solid-core door.

How much clearance should an interior door have?

The door should have a small, even reveal around the top and sides and enough bottom clearance to swing without rubbing the finished floor or rugs. Exact needs vary with flooring, ventilation, and local conditions, so test the door in its actual opening before final trimming.

Why does my new interior door rub at the top?

A top rub often comes from a hinge that is too deeply mortised, loose hinge screws, a door that is sagging, or a jamb that is not plumb. Check hinge seating and screw tightness first, then inspect the reveal before removing material from the door edge.

Can I cut down a new interior door?

Often, but only within the manufacturer’s stated trimming limits. Hollow-core, molded, veneer, and fire-rated doors can have important restrictions. Make small cuts, use a fine-tooth blade, and seal any raw edges after cutting.

Do I need a permit to replace an interior door?

A straightforward like-for-like interior door replacement often does not require a permit, but requirements are local. Ask your building department if the project changes the opening or involves a garage separation, a fire-rated door, accessibility requirements, or another code-regulated assembly.

Finished interior doors creating a polished look in a modern home hallway.
Well-fitted interior doors bring function, privacy, and a finished look to everyday rooms.

Conclusion

Learning how to replace interior doors starts with choosing the right type of replacement and measuring with precision. A slab door can be an efficient upgrade when the jamb is in good condition, while a prehung unit gives you a clean reset when the frame is the problem. Work slowly through fitting, hinge alignment, hardware installation, and finishing, and test the door at every stage. With careful preparation and a willingness to call a professional for structural, rated, or code-sensitive work, an interior door replacement can deliver a durable, polished upgrade.