
Follow us:

Practical ideas for a more beautiful home and a greener life.

Houseplants

How to Repot Houseplants Without Killing Them: A Step-by-Step Guide

Repotting gives crowded houseplants fresh soil and room for healthy roots. This practical guide explains when to repot, how to choose the right container, and how to help indoor plants recover afterward.
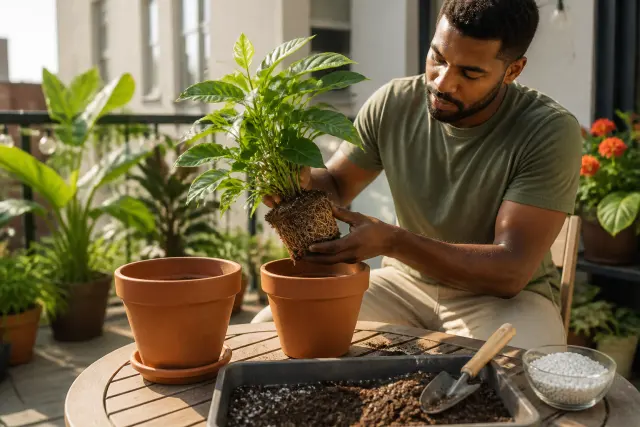
A houseplant being moved from a small terracotta pot into fresh potting mix on a sunny patio.

Introduction

Learning how to repot houseplants is less about doing everything perfectly and more about making a few plant-friendly choices: use a pot with drainage, avoid going dramatically larger, choose a suitable fresh mix, and disturb the roots only as much as needed. Done well, repotting refreshes a plant’s growing space without causing unnecessary stress.

Most common houseplants do not need a new pot every year. Tropical foliage plants, succulents, cacti, orchids, and flowering plants all grow at different rates. Instead of following a calendar alone, look at the roots, the potting mix, and the plant’s overall growth. This guide walks you through the process from deciding whether repotting is needed to helping your plant settle in afterward.
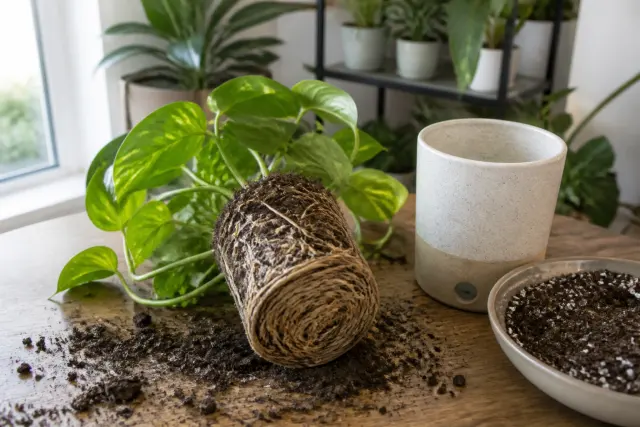
Close-up of circling pothos roots showing that the plant is root-bound.
Dense circling roots are a clear sign that a plant may benefit from repotting or a soil refresh.

Why Houseplants Need Repotting

A pot is a limited environment. Over time, roots fill the available space, watering becomes harder to manage, and potting mix loses the airy structure that allows roots to breathe. Repotting can solve those problems by giving the plant fresh medium, slightly more root room when necessary, and a chance to correct drainage issues.

Fresh potting mix supports healthier roots

Potting mix gradually breaks down into smaller particles. It may hold water too long, compact around roots, or stop rewetting evenly after it dries out. A fresh, appropriate mix restores pore space for air and water movement. This is especially helpful for plants that have been in the same container for several years.

More room is not always the goal

Repotting does not automatically mean moving up to a larger container. Sometimes a plant only needs its old pot cleaned and refilled with fresh mix. This is often called a soil refresh. Moving a small-rooted plant into an oversized pot can leave too much wet soil around the roots and increase the risk of rot.

How to Tell When a Houseplant Needs Repotting

Check several signs before deciding to repot. One clue alone, such as a root emerging from a drainage hole, does not always mean the plant is in trouble. A healthy plant can have a few visible roots and still be comfortable in its pot.

  • Roots circle densely around the root ball or fill nearly all of the pot when you slide the plant out.
  • Roots push through drainage holes or lift the plant above the soil line.
  • Water runs through the pot almost immediately because there is little mix left, or it pools on top because old mix has become compacted.
  • The plant dries out much faster than usual during active growth, despite appropriate light and temperature.
  • Growth is weak in spring and summer, even after you have ruled out light, watering, and pest problems.
  • The pot is cracked, has no drainage, or has become too light and unstable for the plant.

Rule out other causes first

Yellow leaves, drooping, and slow growth can come from overwatering, low light, cold drafts, pests, or normal aging leaves. Do not repot simply because a plant looks unhappy. Inspect the undersides of leaves for pests, check soil moisture several inches down when possible, and consider whether the plant’s light conditions changed recently. Repotting a stressed plant unnecessarily can add another challenge.

The Best Time of Year to Repot Indoor Plants

For most houseplants, spring through early summer is the easiest time to repot. Increasing daylight and active growth help roots recover and grow into fresh mix. In many U.S. homes, this is roughly March through June, though the timing varies with your indoor conditions and local seasonal light.

You can repot at other times when there is a clear need. A pot without drainage, severely compacted soil, root rot, a pest issue centered in the potting mix, or a container that has broken may require prompt action. If you repot during winter, use a conservative pot size, keep the plant warm, and expect slower recovery because light levels are lower.

Consider the plant’s growth cycle

Avoid repotting a plant that is covered in buds or flowers unless its roots or container demand immediate attention. Flowering houseplants may drop blooms when disturbed. For orchids, repotting is usually best after flowering, when new roots are beginning. Cacti and succulents are generally easiest to handle during their active growing season, but allow any damaged roots to dry before watering.

How to Choose the Right Pot Size and Material

Choose a pot with at least one drainage hole. Drainage lets excess water leave the root zone; a decorative outer container can still be used as a cachepot, but remove the nursery pot for watering and let it drain completely before returning it.

Size up gradually

For a plant that needs more room, select a new pot about 1 to 2 inches wider in diameter than the current one for smaller plants. For a large floor plant, moving up 2 to 4 inches is usually plenty. The goal is a modest ring of fresh mix around the roots, not a large reservoir of unused wet soil.

If the plant is not root-bound, choose the same size pot and replace the old mix. This is often the safest option for pothos, philodendrons, snake plants, rubber plants, and other houseplants that are otherwise healthy.

Match the material to your watering habits

Pot materialBest featureWatch for
TerracottaPorous walls help mix dry faster; useful for succulents and growers who water generously.Plants may need water more often, and salts can collect on the outside.
Plastic or resinLightweight and retains moisture longer; practical for many tropical foliage plants.Check moisture carefully to avoid keeping roots wet too long.
Glazed ceramicStable and attractive as a permanent container.Confirm that it has a drainage hole; it can be heavy when watered.

Do not add rocks, gravel, or broken pottery to the bottom of a pot. They do not improve drainage and can create a wetter zone in the mix. Use a pot with a hole and a well-aerated potting mix instead.
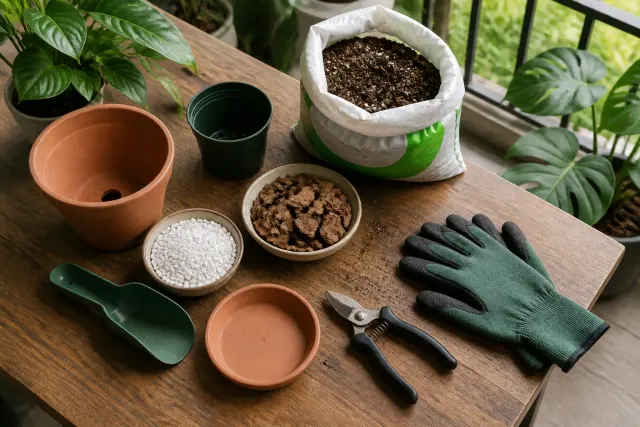
Potting mix, a drainage-hole pot, pruners, perlite, and other supplies for repotting houseplants.
Gathering supplies before starting keeps roots exposed for less time and makes the process smoother.

Choosing Potting Mix for Different Types of Houseplants

Garden soil is too dense for indoor containers. Use a packaged potting mix or make a simple blend from indoor-friendly ingredients. The best mix holds some moisture while allowing excess water and air to move through it.

Tropical foliage plants

Many pothos, philodendrons, monsteras, dracaenas, peace lilies, and similar foliage plants do well in a quality all-purpose indoor potting mix amended with perlite and orchid bark. A useful starting blend is two parts potting mix, one part perlite, and one part fine orchid bark. Adjust toward more bark and perlite for plants that prefer faster drying.

Succulents and cacti

Use a cactus and succulent mix, ideally amended with extra pumice or perlite if the bagged mix feels heavy. These plants need a container with drainage and should not sit in a saucer of water. Their roots are especially vulnerable when dense, moisture-retentive soil stays wet in low winter light.

Orchids and flowering plants

Most common moth orchids need a chunky orchid bark mix rather than regular potting soil. African violets benefit from a lighter mix formulated for their fine roots. For flowering plants generally, avoid changing conditions drastically while buds are forming; repot after flowering when possible.

Supplies to Gather Before You Repot

Set up your materials first so the plant spends as little time with exposed roots as possible. Work on a protected table, a patio, or a sink area where you can manage loose mix. If working outdoors, avoid direct hot sun and strong wind.

  • A clean pot with drainage, in the same size or modestly larger size
  • Fresh potting mix suited to the plant
  • Clean hand pruners or scissors for dead roots only
  • A small trowel, scoop, or spoon
  • A tray or saucer
  • Gloves if you have sensitive skin or are handling spiny plants
  • Newspaper, a plant mat, or a shallow bin to catch spilled mix

Wash tools and pots that have held a diseased plant with soap and water, then let them dry. If a plant has signs of root rot or a serious pest problem, keep its tools and old potting mix separate from healthy plants. Dispose of infested or badly diseased mix rather than adding it to a home compost pile.

How to Repot a Houseplant Step by Step

1. Water at the right time

Water the plant a day or two before repotting if its mix is very dry. Slightly moist soil holds together and releases roots more easily than bone-dry mix. Do not repot when the root ball is soggy, because wet mix is heavy and can smear around delicate roots.

2. Prepare the new pot

Cover the drainage hole with a small piece of mesh only if mix tends to fall out; do not block the hole. Add enough fresh mix to the bottom so the plant will sit at the same depth it did before. Burying stems too deeply encourages rot.

3. Remove and inspect the plant

Tip the pot sideways, support the plant near the base, and gently slide it out. Tap or squeeze flexible plastic pots if needed. For a plant stuck in a rigid pot, run a dull knife around the inner edge carefully rather than yanking on stems. Examine the roots and smell the root ball. Healthy roots are usually firm; their color varies by species, so firmness matters more than color alone.

4. Loosen only the outer roots

Brush away loose old mix from the surface and gently tease apart a few circling roots on the outside of a healthy root ball. You do not need to bare-root most houseplants. For compact but healthy roots, light loosening helps them grow outward into the new mix without causing major disturbance.

5. Position, fill, and water

Center the plant in the new pot. Add mix around the sides in small amounts, lightly firming it with your fingers to remove large air pockets. Do not pack it hard. Leave about 1/2 to 1 inch of watering space below the rim. Water thoroughly until water drains out, then empty the saucer. For cacti, succulents, or plants with cut roots, wait several days before watering so injuries can callus.

What to Do With Root-Bound or Damaged Roots

A root-bound plant has roots growing in a dense circle around the pot. Mild circling is common and usually manageable. Gently pull apart the outer layer with your fingers and make two or three shallow vertical cuts through the outer root mat only if it is extremely tight. This encourages new roots to grow outward.

Handling rot and dead roots

Healthy roots should feel firm. Roots that are black or brown, mushy, hollow, and foul-smelling are likely rotted. Trim those portions with clean, sharp pruners until you reach firm tissue. Remove saturated old mix, use a clean pot with drainage, and repot into a more open mix. Do not fertilize right away. Root rot can be serious; if most roots are damaged, take healthy stem cuttings as a backup when the plant can be propagated that way.

Be extra gentle with sensitive roots

Some plants, including many palms, fiddle-leaf figs, and certain ferns, dislike extensive root disturbance. If their roots are healthy, slide the intact root ball into a slightly larger pot and add fresh mix around it. This approach, sometimes called potting up, is less disruptive than aggressively loosening roots.

How to Care for Houseplants After Repotting

A newly repotted plant may pause growth, droop slightly, or shed one older leaf as it adjusts. Give it stable conditions rather than trying to force fast growth.

  • Place it in bright, indirect light appropriate for its species. Avoid intense direct sun for about one to two weeks unless the plant normally requires full sun.
  • Keep temperatures steady and protect it from heating vents, air-conditioning blasts, and chilly windows.
  • Check moisture before watering. Fresh mix may dry differently than the old mix, so follow the plant’s needs rather than a fixed schedule.
  • Wait about four to six weeks before fertilizing, unless you are using a mix that specifically directs otherwise. Fresh mixes often contain nutrients, and damaged roots can be sensitive to fertilizer salts.
  • Empty saucers and cachepots after watering so roots do not stand in runoff.

Monitor the plant for the next few weeks. If leaves keep yellowing, stems soften, or the mix stays wet for a long time, reassess light, pot size, and drainage. Recovery should look gradual: stable foliage first, then new growth when conditions are right.

Common Houseplant Repotting Mistakes to Avoid

Choosing a pot that is far too large

An oversized pot is one of the most common causes of post-repotting trouble. Extra soil retains water after the small root system has taken what it needs. Move up only a little, or stay in the same pot for a soil refresh.

Using the wrong soil or a pot without drainage

Dense garden soil and containers without holes make it difficult to control moisture. A plant may survive temporarily, but roots have less oxygen and are more likely to rot. Match the mix to the plant and always give excess water a way out.

Overhandling roots and overwatering afterward

Do not wash every bit of old mix from healthy roots or cut them back simply to make them fit. Likewise, do not water repeatedly because the plant looks stressed. Check the mix first. Transplant shock is usually worsened by too much moisture, low light, or sudden temperature changes.

Fertilizing immediately

Fertilizer is not a recovery tonic. Wait until the plant is established and growing again. If you use liquid fertilizer later, apply it at the product’s labeled houseplant rate to already-moist soil.

When Not to Repot a Houseplant

Wait when a plant is doing well and its roots still have room, even if you are tempted to give it a larger decorative pot. Also postpone routine repotting when a plant is actively flowering, newly brought home, severely dehydrated, or struggling with pests. Address the immediate issue first and allow the plant to stabilize.

Plants moved from a greenhouse or store to a home often need time to adjust to different light, humidity, and temperatures. Unless the original pot lacks drainage or roots are clearly in distress, give a new plant several weeks to acclimate before repotting. If pests are present, isolate the plant and treat the infestation; changing soil alone will not solve pests living on leaves or stems.
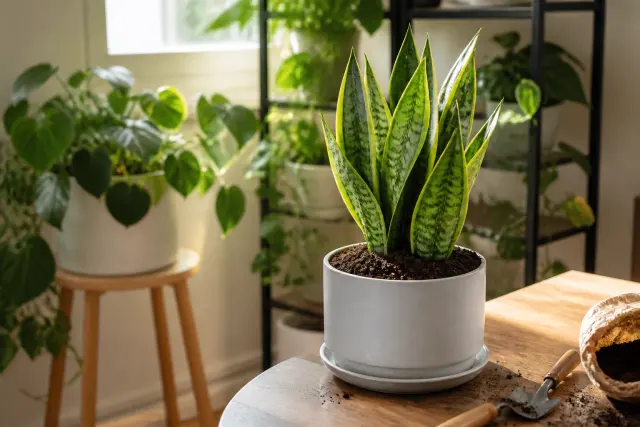
A freshly repotted snake plant placed in bright indirect light after repotting.
After repotting, provide steady light and let the potting mix dry according to the plant’s needs before watering again.

Conclusion

Successful repotting is a calm, measured process. Confirm that your houseplant truly needs attention, choose a clean pot with drainage, use a mix that fits its root needs, and avoid an oversized container. Handle healthy roots gently, remove only damaged roots, and give the plant stable light and careful watering afterward.

Once you know how to repot houseplants, it becomes a useful part of regular indoor plant care rather than a risky chore. Check plants during their active growing season, make small changes when needed, and let their roots—not the calendar or the appeal of a bigger pot—guide your decision.

Frequently Asked Questions

Should I water my houseplant before repotting?

Yes, if the potting mix is dry. Water one or two days beforehand so the root ball is lightly moist and easier to remove. Avoid repotting a plant when its soil is dripping wet and heavy.

How much bigger should a new houseplant pot be?

For most plants, choose a pot about 1 to 2 inches wider than the current pot. Large plants can usually move up 2 to 4 inches. A much larger pot holds excess wet mix around a small root system.

Can I repot a houseplant in the same pot?

Yes. If the plant is not badly root-bound but the mix is old, compacted, or hydrophobic, clean the pot and repot with fresh mix. This refreshes the root environment without giving the plant unnecessary extra space.

Why is my plant drooping after repotting?

Mild drooping can be temporary transplant stress, especially after roots were disturbed. Keep the plant in suitable indirect light, avoid temperature extremes, and water only when the mix needs it. Persistent drooping with wet soil may signal overwatering or root damage.

Should I fertilize after repotting?

Usually, wait about four to six weeks. Fresh potting mix may already contain nutrients, and recently disturbed roots can be sensitive to fertilizer. Resume feeding when the plant has settled and is actively growing.

Can I use regular garden soil to repot indoor plants?

No. Garden soil is typically too dense for containers and may drain poorly indoors. Use a packaged houseplant mix or a plant-specific mix amended with materials such as perlite, pumice, or orchid bark as needed.

What should I do if I find mushy roots while repotting?

Trim mushy, hollow, foul-smelling roots with clean pruners, discard the saturated old mix, and repot into a clean container with drainage and a fresh, airy mix. Reduce watering afterward and do not fertilize until the plant is recovering.

Houseplants

How to Repot Houseplants Without Killing Them: A Step-by-Step Guide

Repotting gives crowded houseplants fresh soil and room for healthy roots. This practical guide explains when to repot, how to choose the right container, and how to help indoor plants recover afterward.

A houseplant being moved from a small terracotta pot into fresh potting mix on a sunny patio.

Introduction

Learning how to repot houseplants is less about doing everything perfectly and more about making a few plant-friendly choices: use a pot with drainage, avoid going dramatically larger, choose a suitable fresh mix, and disturb the roots only as much as needed. Done well, repotting refreshes a plant’s growing space without causing unnecessary stress.

Most common houseplants do not need a new pot every year. Tropical foliage plants, succulents, cacti, orchids, and flowering plants all grow at different rates. Instead of following a calendar alone, look at the roots, the potting mix, and the plant’s overall growth. This guide walks you through the process from deciding whether repotting is needed to helping your plant settle in afterward.

Close-up of circling pothos roots showing that the plant is root-bound.
Dense circling roots are a clear sign that a plant may benefit from repotting or a soil refresh.

Why Houseplants Need Repotting

A pot is a limited environment. Over time, roots fill the available space, watering becomes harder to manage, and potting mix loses the airy structure that allows roots to breathe. Repotting can solve those problems by giving the plant fresh medium, slightly more root room when necessary, and a chance to correct drainage issues.

Fresh potting mix supports healthier roots

Potting mix gradually breaks down into smaller particles. It may hold water too long, compact around roots, or stop rewetting evenly after it dries out. A fresh, appropriate mix restores pore space for air and water movement. This is especially helpful for plants that have been in the same container for several years.

More room is not always the goal

Repotting does not automatically mean moving up to a larger container. Sometimes a plant only needs its old pot cleaned and refilled with fresh mix. This is often called a soil refresh. Moving a small-rooted plant into an oversized pot can leave too much wet soil around the roots and increase the risk of rot.

How to Tell When a Houseplant Needs Repotting

Check several signs before deciding to repot. One clue alone, such as a root emerging from a drainage hole, does not always mean the plant is in trouble. A healthy plant can have a few visible roots and still be comfortable in its pot.

  • Roots circle densely around the root ball or fill nearly all of the pot when you slide the plant out.
  • Roots push through drainage holes or lift the plant above the soil line.
  • Water runs through the pot almost immediately because there is little mix left, or it pools on top because old mix has become compacted.
  • The plant dries out much faster than usual during active growth, despite appropriate light and temperature.
  • Growth is weak in spring and summer, even after you have ruled out light, watering, and pest problems.
  • The pot is cracked, has no drainage, or has become too light and unstable for the plant.

Rule out other causes first

Yellow leaves, drooping, and slow growth can come from overwatering, low light, cold drafts, pests, or normal aging leaves. Do not repot simply because a plant looks unhappy. Inspect the undersides of leaves for pests, check soil moisture several inches down when possible, and consider whether the plant’s light conditions changed recently. Repotting a stressed plant unnecessarily can add another challenge.

The Best Time of Year to Repot Indoor Plants

For most houseplants, spring through early summer is the easiest time to repot. Increasing daylight and active growth help roots recover and grow into fresh mix. In many U.S. homes, this is roughly March through June, though the timing varies with your indoor conditions and local seasonal light.

You can repot at other times when there is a clear need. A pot without drainage, severely compacted soil, root rot, a pest issue centered in the potting mix, or a container that has broken may require prompt action. If you repot during winter, use a conservative pot size, keep the plant warm, and expect slower recovery because light levels are lower.

Consider the plant’s growth cycle

Avoid repotting a plant that is covered in buds or flowers unless its roots or container demand immediate attention. Flowering houseplants may drop blooms when disturbed. For orchids, repotting is usually best after flowering, when new roots are beginning. Cacti and succulents are generally easiest to handle during their active growing season, but allow any damaged roots to dry before watering.

How to Choose the Right Pot Size and Material

Choose a pot with at least one drainage hole. Drainage lets excess water leave the root zone; a decorative outer container can still be used as a cachepot, but remove the nursery pot for watering and let it drain completely before returning it.

Size up gradually

For a plant that needs more room, select a new pot about 1 to 2 inches wider in diameter than the current one for smaller plants. For a large floor plant, moving up 2 to 4 inches is usually plenty. The goal is a modest ring of fresh mix around the roots, not a large reservoir of unused wet soil.

If the plant is not root-bound, choose the same size pot and replace the old mix. This is often the safest option for pothos, philodendrons, snake plants, rubber plants, and other houseplants that are otherwise healthy.

Match the material to your watering habits

Pot materialBest featureWatch for
TerracottaPorous walls help mix dry faster; useful for succulents and growers who water generously.Plants may need water more often, and salts can collect on the outside.
Plastic or resinLightweight and retains moisture longer; practical for many tropical foliage plants.Check moisture carefully to avoid keeping roots wet too long.
Glazed ceramicStable and attractive as a permanent container.Confirm that it has a drainage hole; it can be heavy when watered.

Do not add rocks, gravel, or broken pottery to the bottom of a pot. They do not improve drainage and can create a wetter zone in the mix. Use a pot with a hole and a well-aerated potting mix instead.

Potting mix, a drainage-hole pot, pruners, perlite, and other supplies for repotting houseplants.
Gathering supplies before starting keeps roots exposed for less time and makes the process smoother.

Choosing Potting Mix for Different Types of Houseplants

Garden soil is too dense for indoor containers. Use a packaged potting mix or make a simple blend from indoor-friendly ingredients. The best mix holds some moisture while allowing excess water and air to move through it.

Tropical foliage plants

Many pothos, philodendrons, monsteras, dracaenas, peace lilies, and similar foliage plants do well in a quality all-purpose indoor potting mix amended with perlite and orchid bark. A useful starting blend is two parts potting mix, one part perlite, and one part fine orchid bark. Adjust toward more bark and perlite for plants that prefer faster drying.

Succulents and cacti

Use a cactus and succulent mix, ideally amended with extra pumice or perlite if the bagged mix feels heavy. These plants need a container with drainage and should not sit in a saucer of water. Their roots are especially vulnerable when dense, moisture-retentive soil stays wet in low winter light.

Orchids and flowering plants

Most common moth orchids need a chunky orchid bark mix rather than regular potting soil. African violets benefit from a lighter mix formulated for their fine roots. For flowering plants generally, avoid changing conditions drastically while buds are forming; repot after flowering when possible.

Supplies to Gather Before You Repot

Set up your materials first so the plant spends as little time with exposed roots as possible. Work on a protected table, a patio, or a sink area where you can manage loose mix. If working outdoors, avoid direct hot sun and strong wind.

  • A clean pot with drainage, in the same size or modestly larger size
  • Fresh potting mix suited to the plant
  • Clean hand pruners or scissors for dead roots only
  • A small trowel, scoop, or spoon
  • A tray or saucer
  • Gloves if you have sensitive skin or are handling spiny plants
  • Newspaper, a plant mat, or a shallow bin to catch spilled mix

Wash tools and pots that have held a diseased plant with soap and water, then let them dry. If a plant has signs of root rot or a serious pest problem, keep its tools and old potting mix separate from healthy plants. Dispose of infested or badly diseased mix rather than adding it to a home compost pile.

How to Repot a Houseplant Step by Step

1. Water at the right time

Water the plant a day or two before repotting if its mix is very dry. Slightly moist soil holds together and releases roots more easily than bone-dry mix. Do not repot when the root ball is soggy, because wet mix is heavy and can smear around delicate roots.

2. Prepare the new pot

Cover the drainage hole with a small piece of mesh only if mix tends to fall out; do not block the hole. Add enough fresh mix to the bottom so the plant will sit at the same depth it did before. Burying stems too deeply encourages rot.

3. Remove and inspect the plant

Tip the pot sideways, support the plant near the base, and gently slide it out. Tap or squeeze flexible plastic pots if needed. For a plant stuck in a rigid pot, run a dull knife around the inner edge carefully rather than yanking on stems. Examine the roots and smell the root ball. Healthy roots are usually firm; their color varies by species, so firmness matters more than color alone.

4. Loosen only the outer roots

Brush away loose old mix from the surface and gently tease apart a few circling roots on the outside of a healthy root ball. You do not need to bare-root most houseplants. For compact but healthy roots, light loosening helps them grow outward into the new mix without causing major disturbance.

5. Position, fill, and water

Center the plant in the new pot. Add mix around the sides in small amounts, lightly firming it with your fingers to remove large air pockets. Do not pack it hard. Leave about 1/2 to 1 inch of watering space below the rim. Water thoroughly until water drains out, then empty the saucer. For cacti, succulents, or plants with cut roots, wait several days before watering so injuries can callus.

What to Do With Root-Bound or Damaged Roots

A root-bound plant has roots growing in a dense circle around the pot. Mild circling is common and usually manageable. Gently pull apart the outer layer with your fingers and make two or three shallow vertical cuts through the outer root mat only if it is extremely tight. This encourages new roots to grow outward.

Handling rot and dead roots

Healthy roots should feel firm. Roots that are black or brown, mushy, hollow, and foul-smelling are likely rotted. Trim those portions with clean, sharp pruners until you reach firm tissue. Remove saturated old mix, use a clean pot with drainage, and repot into a more open mix. Do not fertilize right away. Root rot can be serious; if most roots are damaged, take healthy stem cuttings as a backup when the plant can be propagated that way.

Be extra gentle with sensitive roots

Some plants, including many palms, fiddle-leaf figs, and certain ferns, dislike extensive root disturbance. If their roots are healthy, slide the intact root ball into a slightly larger pot and add fresh mix around it. This approach, sometimes called potting up, is less disruptive than aggressively loosening roots.

How to Care for Houseplants After Repotting

A newly repotted plant may pause growth, droop slightly, or shed one older leaf as it adjusts. Give it stable conditions rather than trying to force fast growth.

  • Place it in bright, indirect light appropriate for its species. Avoid intense direct sun for about one to two weeks unless the plant normally requires full sun.
  • Keep temperatures steady and protect it from heating vents, air-conditioning blasts, and chilly windows.
  • Check moisture before watering. Fresh mix may dry differently than the old mix, so follow the plant’s needs rather than a fixed schedule.
  • Wait about four to six weeks before fertilizing, unless you are using a mix that specifically directs otherwise. Fresh mixes often contain nutrients, and damaged roots can be sensitive to fertilizer salts.
  • Empty saucers and cachepots after watering so roots do not stand in runoff.

Monitor the plant for the next few weeks. If leaves keep yellowing, stems soften, or the mix stays wet for a long time, reassess light, pot size, and drainage. Recovery should look gradual: stable foliage first, then new growth when conditions are right.

Common Houseplant Repotting Mistakes to Avoid

Choosing a pot that is far too large

An oversized pot is one of the most common causes of post-repotting trouble. Extra soil retains water after the small root system has taken what it needs. Move up only a little, or stay in the same pot for a soil refresh.

Using the wrong soil or a pot without drainage

Dense garden soil and containers without holes make it difficult to control moisture. A plant may survive temporarily, but roots have less oxygen and are more likely to rot. Match the mix to the plant and always give excess water a way out.

Overhandling roots and overwatering afterward

Do not wash every bit of old mix from healthy roots or cut them back simply to make them fit. Likewise, do not water repeatedly because the plant looks stressed. Check the mix first. Transplant shock is usually worsened by too much moisture, low light, or sudden temperature changes.

Fertilizing immediately

Fertilizer is not a recovery tonic. Wait until the plant is established and growing again. If you use liquid fertilizer later, apply it at the product’s labeled houseplant rate to already-moist soil.

When Not to Repot a Houseplant

Wait when a plant is doing well and its roots still have room, even if you are tempted to give it a larger decorative pot. Also postpone routine repotting when a plant is actively flowering, newly brought home, severely dehydrated, or struggling with pests. Address the immediate issue first and allow the plant to stabilize.

Plants moved from a greenhouse or store to a home often need time to adjust to different light, humidity, and temperatures. Unless the original pot lacks drainage or roots are clearly in distress, give a new plant several weeks to acclimate before repotting. If pests are present, isolate the plant and treat the infestation; changing soil alone will not solve pests living on leaves or stems.

Frequently Asked Questions

Should I water my houseplant before repotting?

Yes, if the potting mix is dry. Water one or two days beforehand so the root ball is lightly moist and easier to remove. Avoid repotting a plant when its soil is dripping wet and heavy.

How much bigger should a new houseplant pot be?

For most plants, choose a pot about 1 to 2 inches wider than the current pot. Large plants can usually move up 2 to 4 inches. A much larger pot holds excess wet mix around a small root system.

Can I repot a houseplant in the same pot?

Yes. If the plant is not badly root-bound but the mix is old, compacted, or hydrophobic, clean the pot and repot with fresh mix. This refreshes the root environment without giving the plant unnecessary extra space.

Why is my plant drooping after repotting?

Mild drooping can be temporary transplant stress, especially after roots were disturbed. Keep the plant in suitable indirect light, avoid temperature extremes, and water only when the mix needs it. Persistent drooping with wet soil may signal overwatering or root damage.

Should I fertilize after repotting?

Usually, wait about four to six weeks. Fresh potting mix may already contain nutrients, and recently disturbed roots can be sensitive to fertilizer. Resume feeding when the plant has settled and is actively growing.

Can I use regular garden soil to repot indoor plants?

No. Garden soil is typically too dense for containers and may drain poorly indoors. Use a packaged houseplant mix or a plant-specific mix amended with materials such as perlite, pumice, or orchid bark as needed.

What should I do if I find mushy roots while repotting?

Trim mushy, hollow, foul-smelling roots with clean pruners, discard the saturated old mix, and repot into a clean container with drainage and a fresh, airy mix. Reduce watering afterward and do not fertilize until the plant is recovering.

A freshly repotted snake plant placed in bright indirect light after repotting.
After repotting, provide steady light and let the potting mix dry according to the plant’s needs before watering again.

Conclusion

Successful repotting is a calm, measured process. Confirm that your houseplant truly needs attention, choose a clean pot with drainage, use a mix that fits its root needs, and avoid an oversized container. Handle healthy roots gently, remove only damaged roots, and give the plant stable light and careful watering afterward.

Once you know how to repot houseplants, it becomes a useful part of regular indoor plant care rather than a risky chore. Check plants during their active growing season, make small changes when needed, and let their roots—not the calendar or the appeal of a bigger pot—guide your decision.