
Microgreens for Profit: A Beginner’s Guide to Growing and Selling Year-Round
Microgreens can turn a shelf, spare room, or small indoor setup into a practical garden income stream. This guide covers crop selection, production planning, realistic pricing, and local sales channels for U.S. beginners.
Introduction
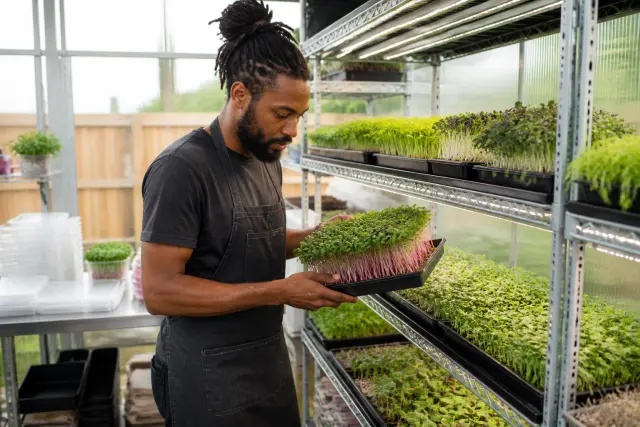
Growing microgreens for profit is one of the more practical ways to start a small garden side hustle. These young, tender greens grow quickly, use little space, and can be produced indoors through every season. A few shelves in a clean spare room, basement, garage, or heated outbuilding can support a steady harvest when outdoor beds are dormant.
But fast growth does not automatically mean easy money. Successful sellers grow crops that local customers actually want, keep production clean and consistent, and price each package with labor, supplies, and spoilage in mind. The goal is not to fill every tray possible. It is to build repeat sales with fresh, attractive greens delivered or picked up on a dependable schedule.
This beginner guide explains how to choose crops, estimate the numbers behind each tray, build a simple growing setup, and find nearby buyers before you invest heavily. Start small, record what happens, and expand only when your sales are keeping pace with your harvest.
Why Microgreens Are a Strong Crop for Small-Space Garden Income
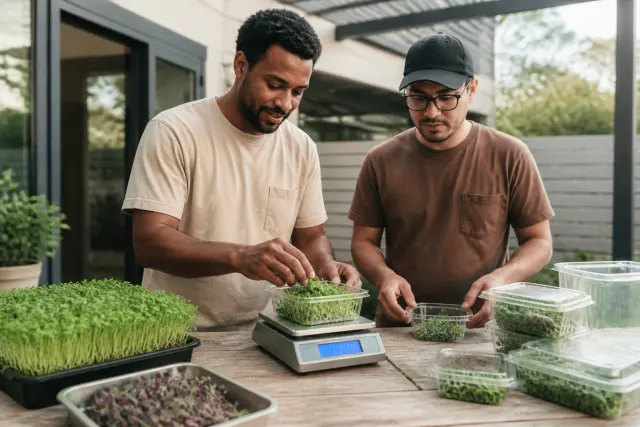
Microgreens are edible seedlings harvested after their first seed leaves open and, for some crops, just as the first true leaves begin to show. They are not sprouts: microgreens are grown in a growing medium with light and are cut above the surface. Common varieties include broccoli, radish, pea shoots, sunflower, arugula, kale, cabbage, basil, cilantro, and colorful mixes.
Fast crop cycles support frequent sales
Many microgreens are ready in roughly one to three weeks, depending on the crop, temperature, light, and desired harvest size. Radish and broccoli tend to be quick. Pea shoots and sunflower often need somewhat longer. This short cycle lets you respond to customer feedback sooner than you could with many field-grown vegetables.
Because you can seed in small batches every week, you do not have to gamble your whole season on one planting date. That flexibility is valuable for a beginner learning what local restaurants, market shoppers, and household customers will buy.
Small footprint, controlled environment
A rack with lights can produce far more saleable greens per square foot than many outdoor crops. Indoor growing also reduces weather risk. Winter freezes, summer heat, wind, and heavy rain are less likely to interrupt your production schedule when temperature, airflow, watering, and lighting are under your control.
Indoor production still takes work. You must sanitize trays, manage humidity, monitor crops daily, and keep equipment running. Electricity and water are real operating costs. Treat the setup as a tiny farm, not a passive shelf of plants.
Freshness creates local value
Microgreens are perishable, and that can be an advantage for a local grower. A chef or household customer may value greens harvested the same morning more than a product that traveled several days through a supply chain. Your best selling point is often simple: clean, flavorful greens harvested to order or on a predictable weekly schedule.
Choose Microgreens That Sell Reliably in Your Local Market
Start with a short crop list instead of offering every variety in a seed catalog. Three to five dependable crops are enough to learn your system and test demand. Choose crops based on flavor, appearance, growing reliability, seed cost, and the buyers you can realistically reach.
Beginner-friendly crops to test
- Radish: Fast, colorful, and peppery. It is often useful in salad mixes and as a garnish.
- Broccoli or kale: Mild brassica greens that can appeal to health-focused home customers.
- Pea shoots: Sweet, substantial, and popular with many cooks. They need a taller tray or more headroom.
- Sunflower: Crunchy and nutty with a hearty texture. Use seed intended for edible production, not treated planting seed.
- Spicy or mild mixes: A mix can simplify sales by giving customers one versatile product rather than too many choices.
Herbs such as basil and cilantro can command attention, but they may be slower or less forgiving. Add them after your sanitation, germination, and harvest routine is reliable. Specialty varieties only make sense after a buyer asks for them or your market tests show repeat interest.
Match crops to buyer type
Restaurants may want pea shoots, sunflower, radish, or distinctive garnish mixes. Farmers market shoppers may prefer a mild salad blend plus one bold flavor. Subscription customers often appreciate familiar choices and a simple weekly add-on. Ask prospective buyers how they plan to use the greens, what package size fits their kitchen, and how often they would reorder.
Use untreated seed sold for microgreen or food use when possible, and retain supplier and lot information. Avoid seed labeled for ornamental use or seed treated with chemicals. Seed quality has a direct effect on germination, crop uniformity, and customer confidence.
Calculate Startup Costs, Yield, and Profit Per Tray
A microgreen business becomes clearer when you track each tray as a small unit of production. Do not set prices by copying a social media post from another city. Your costs, local demand, package size, and sales channel determine whether a crop is worth repeating.
Build a realistic startup list
A basic indoor setup may include shelving, waterproof trays, LED grow lights, timers, fans, seed, growing medium or mats, blackout covers or weighted trays, a scale, harvest knives or scissors, food-safe packaging, labels, and cleaning supplies. You may also need a table, storage bins, a cooler or refrigerator space, and a way to transport orders safely.
Buy a small, durable system first. A few standard-size trays are easier to wash, stack, record, and replace than a collection of mismatched containers. Before adding another rack, prove that you can sell the harvest from the first one consistently.
Use a per-tray cost worksheet
For every crop, record seed weight and cost, medium or mat cost, tray wear, packaging, labels, electricity, water, delivery expenses, market fees, and a reasonable allowance for labor. Then weigh the harvested greens and note how many sellable packages the tray produced. Include crop losses. A tray with uneven growth, mold, or unsold product still costs money.
| Worksheet item | How to calculate it | Why it matters |
|---|---|---|
| Variable cost per tray | Seed + medium + packaging + direct utilities | Shows the cost that rises with every tray seeded. |
| Labor per tray | Minutes for soaking, seeding, watering, cleaning, harvesting, packing, and selling | Prevents you from treating your time as free. |
| Sellable yield | Total harvested weight minus discarded or damaged greens | Gives an honest packaging capacity. |
| Revenue per tray | Packages sold × your actual selling price | Measures sales, not just potential output. |
| Net contribution | Revenue minus variable costs and labor allowance | Helps compare crops and channels. |
For example, if one tray fills several packages, multiply the number of packages by the price customers actually paid, then subtract the costs assigned to that tray. Keep fixed costs, such as shelving, separate at first, then spread them across your production as sales become steady. A spreadsheet or notebook is enough if you update it every harvest.
Plan for losses and unsold inventory
Do not assume every planted tray becomes revenue. Germination failures, mold, accidental overwatering, broken stems, delayed pickup, and slow market days happen. Seed only what you have a reasonable path to sell. Preorders and standing weekly orders reduce waste and make cash flow more predictable.
Set Up a Simple Indoor Microgreen Growing System
Your growing area should be clean, washable, and easy to monitor. A spare room can work well if it has nearby water, adequate electrical capacity, airflow, and protection from pets, dust, and household traffic. A garage or shed may need insulation or supplemental heat in cold climates. In hot, humid regions, ventilation and dehumidification can become especially important.
Core equipment and layout
Use sturdy shelving that can hold wet trays safely. Place LED lights above each shelf and connect them to timers so your light schedule is consistent. Add gentle air circulation with a fan, but do not aim strong airflow directly at seedlings. Keep a separate clean area for seeding and packaging whenever possible.
Protect floors and electrical connections from water. Use equipment rated for the setting, avoid overloaded power strips, and create drip loops on cords. If you are unsure whether an outlet can safely handle lights, fans, and other equipment, ask a qualified electrician.
Consistency beats complexity
Most microgreens need a suitable growing medium, even moisture, adequate light after germination, and a moderate growing temperature. Follow crop-specific seeding rates and blackout guidance from a reputable seed supplier or Extension resource. Crowding trays to chase higher yield can increase weak stems and disease problems.
Wash and sanitize trays, tools, and work surfaces between crops. Use potable water. Remove questionable trays promptly rather than hoping a mold issue will improve. Good airflow, careful watering, clean trays, and sensible seeding density are your strongest routine defenses against crop loss.
Create a Weekly Seeding and Harvest Schedule
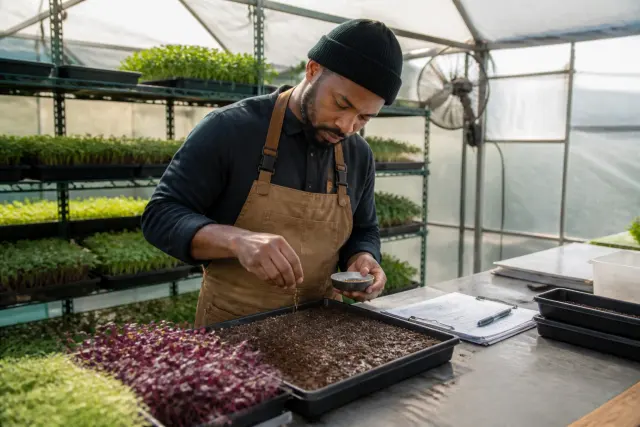
Year-round sales depend on rhythm. Rather than seeding everything at once, stagger plantings so you have a manageable harvest each week. Start by selecting one regular harvest day and work backward from the typical days to harvest for each crop.
Start with a small production cadence
Suppose your initial goal is a modest weekly order list. Seed a few trays of fast radish or broccoli on one day, then seed pea shoots or sunflower on the day that lines up with their longer crop cycle. As you learn your real harvest weights, adjust the number of trays. The right number is the one that fills confirmed orders with a small, intentional buffer—not the maximum that fits on a shelf.
- Daily: Check moisture, airflow, temperature, and crop condition; remove any problem tray.
- One or two days each week: Soak seed if needed, fill and seed trays, and log crop details.
- Harvest day: Cut, weigh, pack, label, chill, and confirm pickups or deliveries.
- After harvest: Wash and sanitize trays, record yield, sales, waste, and customer requests.
Use records to improve every cycle
Label every tray with crop, seed lot, date seeded, and planned harvest date. Track germination, harvest weight, quality notes, and customer response. These records show which varieties earn their shelf space. They also help you trace a problem if a customer has a quality concern.
Seasonality still matters indoors. Farmers markets may be busier in warm months, restaurants can change menus, and household demand may rise around holidays or dip during vacation periods. Your growing environment may also shift with winter heating or summer humidity. Adjust seeding volume rather than assuming every week will sell the same amount.
Harvest, Package, and Handle Microgreens for Local Sales
Harvesting and handling are where a beautiful tray becomes a professional product. Cut greens when they are dry, clean, and at their best size. Use a sharp, clean knife or scissors and avoid pulling roots or growing medium into the package.
Protect freshness and food safety
Use clean, food-safe containers and keep packaging supplies dry and protected from dust. Many growers prefer to avoid washing delicate microgreens because extra moisture can shorten shelf life; if you do wash, use safe water and dry the greens thoroughly before packing. Follow the handling method appropriate to your crop and local requirements.
Refrigerate finished product promptly and maintain a reliable cold chain during storage, pickup, and delivery. Do not sell greens with off odors, sliminess, visible mold, or poor appearance. Be conservative: replacing one package costs less than damaging a customer's trust.
Label clearly and follow applicable rules
A useful label commonly includes the product name, net weight or count when required, packed-on date, storage guidance, your business name and contact information, and any information required by your state or local jurisdiction. Rules for packaged produce, farmers markets, home-based food businesses, sales tax, and business licensing vary widely. Contact your local health department, state agriculture department, market manager, and Extension office before selling.
Keep harvest and sales records, especially when selling to restaurants. If you plan to sell at scale, ship across state lines, or make health claims, get professional guidance on the rules that apply to your operation.
Price Microgreens for Restaurants, Farmers Markets, and Direct Customers
Pricing is not one number for every buyer. Restaurants may expect consistent larger packs and a delivery routine. Farmers market shoppers often accept a higher per-ounce price for convenience and a chance to meet the grower. Direct customers may value subscription convenience but need efficient pickup or delivery routes.
Price from costs, then validate locally
First, determine your minimum sustainable price using the per-tray worksheet. Then visit local markets, speak with growers when appropriate, review grocery offerings, and ask potential buyers what sizes they use. Do not underprice simply to win the first sale. A price that does not cover packaging, selling time, fuel, market fees, and labor will make growth harder.
Offer straightforward package sizes. A small clamshell or bag can work for home cooks, while a larger weighed pack may suit a chef. State the weight clearly if you sell by weight. A mixed product should be consistent enough that customers know what flavor and appearance to expect each time.
Choose sales channels intentionally
| Channel | Potential advantage | Watch for |
|---|---|---|
| Restaurants and caterers | Recurring orders and clear crop requests | Demand for reliability, invoicing, delivery timing, and consistent quality |
| Farmers markets | Direct feedback and a chance to build local recognition | Booth fees, weather, travel, sampling rules, and unsold inventory |
| Preorder pickup | Low waste and simple logistics | Need for clear cutoff times and dependable customer communication |
| Weekly subscriptions | Predictable demand and repeat relationships | Customer pauses, delivery coordination, and the need for variety |
For restaurants, consider a short standing-order menu with a few crops, harvest days, minimum order expectations, and a delivery area. For direct sales, offer a weekly preorder list. Keep delivery fees visible or set a sensible minimum order so small orders do not consume all your margin.
Find Local Buyers and Test Demand Before Scaling Up
Your first customers are often close to home. Start with people and businesses you can serve consistently: independent restaurants, coffee shops with food programs, meal-prep businesses, small grocers, community-supported agriculture farms looking for add-ons, and neighbors who enjoy cooking.
Sell a trial, not a vague promise
Prepare a clean sample of your best crop and introduce yourself during a non-rush time. Ask chefs or buyers whether they use microgreens now, which varieties they buy, how much they use weekly, and what delivery day would help. Do not pressure them to commit. Offer a limited trial order with clear packaging, price, and availability.
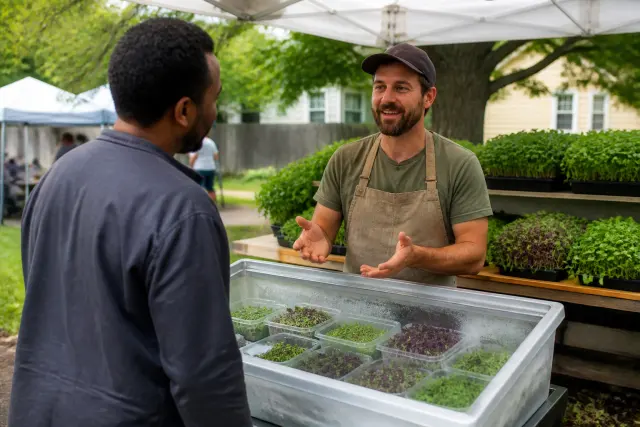
At a market, bring a focused selection and observe what customers ask. A quick conversation can reveal whether shoppers want mild greens for sandwiches, spicy greens for tacos, or a larger pea-shoot pack for stir-fries. Collect email addresses only with permission, and use preorders to test repeat demand.
Scale one confirmed customer at a time
A reliable weekly order is more valuable than a large one-time purchase. Add trays only after customers reorder. If a crop repeatedly lingers, reduce it, change the package size, or stop growing it. Your sales records should guide expansion more than excitement about a new variety.
As income becomes regular, separate business and personal records, save receipts, and set aside funds for taxes. Requirements for business registration, insurance, sales tax, and home occupation rules vary by location. A local small-business adviser, accountant, Extension educator, or attorney can help you understand the rules for your situation.
Avoid Common Microgreen Business Mistakes
- Growing before selling: Seed to confirmed orders and conservative forecasts, especially when you are new.
- Offering too many varieties: A short list makes seeding, harvesting, inventory, and customer choice easier.
- Ignoring labor: Cleaning trays, answering messages, packing, and delivery are part of the cost of every sale.
- Using inconsistent packaging: Standardized packs and clear labels make your product easier to trust and reorder.
- Skipping sanitation: Dirty trays, standing water, and poor airflow can turn a profitable crop into waste quickly.
- Taking on distant deliveries: Long, low-value routes can erase profits. Build dense local routes or use pickup.
- Expanding equipment too early: Buy more shelving only after recurring sales justify more production.
- Overlooking local rules: Check market, food-handling, zoning, licensing, and tax requirements before opening for sales.
The simplest solution is to operate like a careful grower and a careful business owner from day one. Keep records, communicate promptly, show up when promised, and correct quality problems quickly. Those habits are easier to scale than a complicated crop lineup.
Conclusion
Microgreens for profit can be a realistic year-round gardening income stream when you begin with a manageable system and sell locally. Focus on a few dependable crops, calculate your costs by tray, harvest with care, and build production around repeat demand. A small indoor rack will not replace every full-time income, but it can become a useful side business with disciplined growing and strong customer relationships.
Start with a modest trial: grow a few clean, consistent trays, talk to likely buyers, and track every harvest and sale. Then let your records—not guesswork—tell you which crops, package sizes, and sales channels deserve more space on the shelf.
Frequently Asked Questions
How much space do I need to start growing microgreens for profit?
You can begin with one sturdy shelf or rack and a small number of standard trays. Start with only the space needed to fill a few test orders. A clean, temperature-manageable area with water access, safe electrical service, lighting, and airflow matters more than having a large room.
What are the easiest microgreens for a beginner to sell?
Radish, broccoli, kale, pea shoots, sunflower, and a simple mild or spicy mix are practical crops to test. Choose only a few at first, then keep the varieties that grow consistently and receive repeat orders from your local buyers.
How long do microgreens take to grow?
Many varieties are ready in about one to three weeks. The exact timing depends on the crop, temperature, light, seed quality, and harvest size. Track your own days to harvest because your indoor conditions may differ from another grower's.
Do I need a license to sell microgreens from home?
Possibly. Requirements vary by state, county, city, sales channel, packaging method, and whether you deliver or sell through a market. Ask your local health department, state agriculture department, farmers market manager, and Extension office which food, business, zoning, labeling, and tax rules apply.
How do I know what to charge for microgreens?
Calculate the full cost of one tray, including seed, medium, packaging, utilities, labor, market fees, delivery, and expected waste. Use that number to set a sustainable minimum, then compare package sizes and prices in your local market. Different channels may need different pricing.
Can I sell microgreens to restaurants?
Yes, local restaurants can be good customers if you provide consistent quality, clear package weights, dependable harvest days, and prompt communication. Approach chefs or buyers during a non-busy time, ask what they use, and offer a small trial order instead of growing a large amount first.
How can I keep microgreens fresh after harvest?
Harvest clean, dry greens with sanitized tools, pack them in food-safe containers, refrigerate promptly, and keep them cool during delivery or pickup. Do not sell product with mold, sliminess, off odors, or poor appearance. Follow any applicable local food-handling requirements.